I was staring at a pantry full of pickles, cheese, and breadcrumbs, and my friend dared me to turn them into something that would make our game‑night snack table feel like a gourmet affair. The kitchen smelled of brine and melted cheddar, while the sound of the fridge door slamming echoed like a drumbeat. I imagined a crisp bite that would crackle under the tongue, followed by a warm, gooey center that would make you question why you ever settled for plain chips. I knew this wasn’t going to be a run‑of‑the‑mill pickle dip; it was going to be a crunchy, savory, melt‑in‑your‑mouth experience that would leave everyone begging for seconds. The challenge? To fuse the tang of dill with the richness of cheese into a single bite‑size marvel.
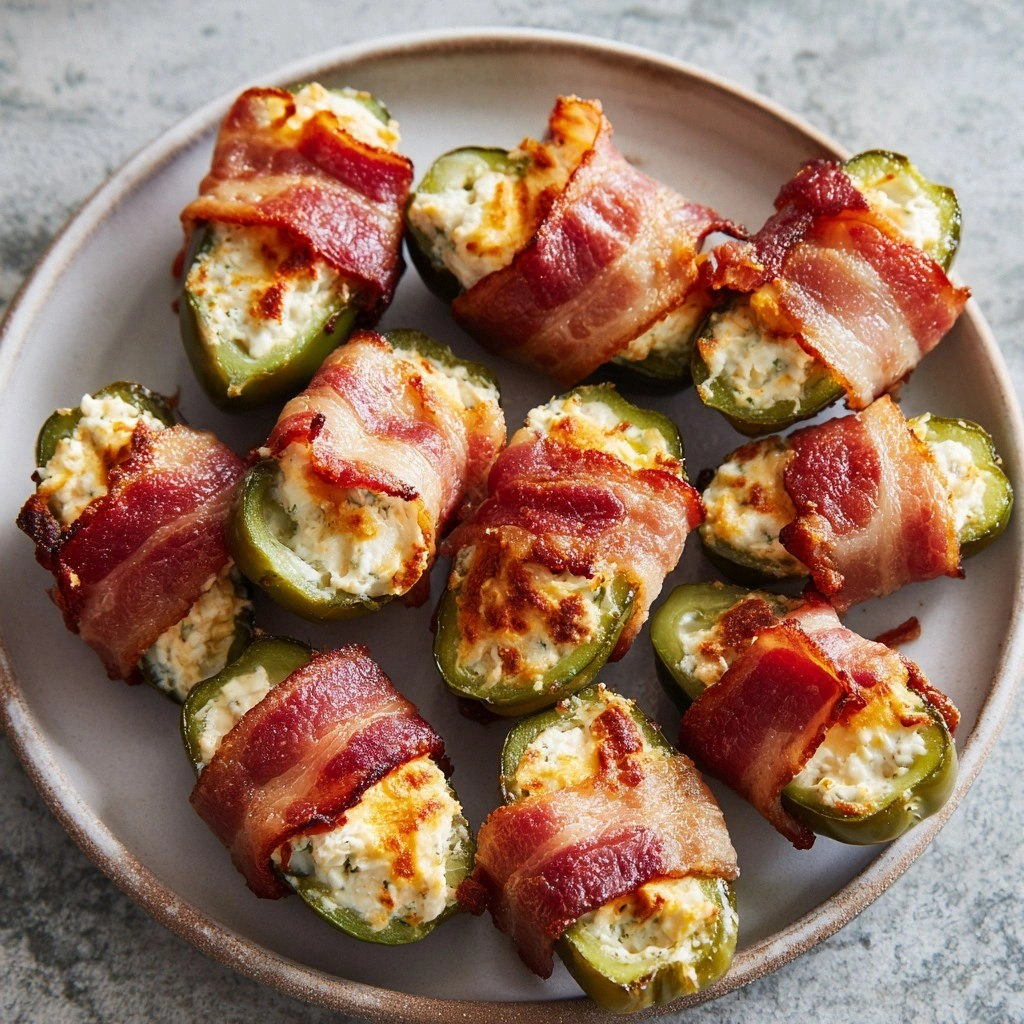
Picture yourself pulling this out of the oven, the whole kitchen smelling incredible, as golden poppers glimmer like tiny, savory jewels on a platter. The first bite is a crack of crunchy breadcrumbs that shatters like thin ice, followed by a molten cheddar wave that coats your palate like velvet. The dill punch is sharp yet balanced, cutting through the richness without overpowering it. I dare you to taste this and not go back for seconds. The result is a harmony of textures and flavors that feels both indulgent and comforting, like a warm hug from your favorite childhood snack.
What sets this version apart is that it’s not just a recipe; it’s an experience. I’ve refined the technique to keep the cheese gooey inside while the exterior remains crisp and buttery. The combination of smoked paprika and garlic powder adds depth, turning each popper into a flavor bomb that explodes with a subtle heat. I’ve also perfected the coating ratio so that the breadcrumbs never become soggy, even if you leave them to rest for a few minutes before baking. The result? A dish that feels like a gourmet appetizer but can be whipped up in minutes, making it ideal for any gathering or a quick midnight craving.
And if you think you’ve tried all the pickle popper variations out there, think again. The secret ingredient is a splash of mustard that lingers on the cheese, giving it a subtle tang that elevates the entire bite. The final touch? A light brush of melted butter before baking, which creates a golden, buttery crust that’s impossible to resist. This is hands down the best version you’ll ever make at home, and it’s going to change how you view pickles forever. Let me walk you through every single step — by the end, you’ll wonder how you ever made it any other way.
What Makes This Version Stand Out
- Taste: The blend of sharp dill, smoky paprika, and buttery breadcrumbs creates a layered flavor profile that dances on the tongue. The mustard infusion adds a subtle zing that keeps the cheese from becoming cloying.
- Texture: The exterior is a crunchy, golden crust that gives way to a molten cheddar center, offering a satisfying contrast in every bite.
- Ease: All steps are straightforward, with no specialized equipment required. The recipe scales beautifully for both small gatherings and large parties.
- Uniqueness: The combination of pickles and cheese in a popper format is uncommon, giving this dish a distinctive edge over standard dips.
- Crowd Appeal: Whether you’re hosting a game night or a family dinner, these poppers are guaranteed to be a hit. They’re finger‑friendly and can be served with a variety of dips.
- Ingredient Quality: Using fresh dill pickles and sharp cheddar ensures the final product is flavorful and satisfying.
- Make‑Ahead Potential: Prepare the mixture ahead of time, refrigerate, and bake when ready. The flavors only deepen.
- Presentation: The vibrant green of the pickles and the golden crust make for an eye‑catching appetizer that looks as good as it tastes.
Inside the Ingredient List
The Flavor Base
The core of every great dish is its flavor foundation, and here it’s a marriage of pickles and cheese. The pickles bring acidity and a refreshing crunch, while the cheddar delivers a rich, savory melt that balances the tang. If you skip the pickles, you lose that signature bite that makes these poppers memorable. Swapping cheddar for mozzarella will give you a milder, less tangy experience, but it’ll still be delicious.
Choosing the right pickles is essential; a good dill pickle with a crisp bite is preferable over a sweet or bread-and-butter variety. The sharper the pickle, the more pronounced the dill flavor, which keeps the cheese from feeling heavy. A quick tip: rinse the chopped pickles under cold water to reduce excess salt before mixing.
When it comes to cheese, sharp cheddar works best because it melts well and carries the dill’s bite. If you’re looking for a different flavor profile, try pepper jack for a hint of heat or Gruyère for a nutty undertone. Remember, the cheese is the heart of the poppers, so don’t compromise on quality.
The Texture Crew
Breadcrumbs are the unsung heroes that create the coveted crunch. They absorb moisture from the cheese and pickles, forming a golden, crisp shell. Use fresh breadcrumbs for maximum crunch; stale ones will produce a soggy texture. If you’re vegan or gluten‑free, opt for gluten‑free breadcrumbs or crushed crackers.
Flour acts as a binder, helping the mixture hold together before it goes into the oven. A light dusting of flour keeps the poppers from falling apart during baking. For an extra touch of texture, consider adding a pinch of cornstarch to the flour mixture.
Eggs are the glue that binds everything together, ensuring a uniform shape. If you’re avoiding eggs, you can use a flaxseed or chia egg as a substitute, but the texture will be slightly different. The egg also contributes to the browning of the crust.
The Unexpected Star
Mustard isn’t just a condiment here; it’s a flavor enhancer that adds depth to the cheese’s richness. Dijon or whole‑grain mustard works best, but a touch of yellow mustard will also do. A splash of mustard keeps the cheese from becoming too heavy, giving the poppers a bright, zesty finish.
Smoked paprika brings a subtle heat and a smoky undertone that complements the dill. If you prefer a milder flavor, reduce the amount or omit it entirely. Garlic powder adds a savory note that rounds out the overall taste profile.
Salt and pepper are essential for seasoning, but be careful not to over‑salt, especially if your pickles are already salty. Taste the mixture before baking and adjust accordingly. The balance of salt and pepper is crucial for the poppers’ final flavor.
The Final Flourish
Olive oil is used to coat the baking sheet and help the breadcrumbs achieve a golden brown. A light drizzle before baking ensures a crisp exterior. If you prefer a richer flavor, swap olive oil for melted butter.
A final brush of melted butter just before the poppers hit the oven adds an extra layer of shine and flavor. It also helps the breadcrumbs crisp up to perfection. For a dairy‑free version, use coconut oil or a plant‑based butter alternative.
Chopped chives or parsley can be sprinkled on top after baking for a burst of color and freshness. This garnish not only looks appealing but also adds a subtle herbal note that ties the dish together.
Everything's prepped? Good. Let's get into the real action.
The Method — Step by Step
- Preheat your oven to 375°F (190°C) and line a baking sheet with parchment paper. A well‑lined sheet prevents sticking and ensures even cooking. This is the moment of truth; if you skip preheating, the poppers won’t develop that desirable golden crust.
- In a large mixing bowl, combine the chopped dill pickles and shredded cheddar cheese. Toss them together until the cheese coats the pickle pieces evenly. This mixture should feel moist but not soggy; the cheese must be the glue.
- Add the breadcrumbs, flour, mustard, smoked paprika, garlic powder, salt, and pepper to the bowl. Mix until all components are evenly distributed. The mixture should be thick enough to hold its shape when scooped.
- Beat the eggs in a separate bowl. Pour the egg into the mixture, then stir until everything is fully incorporated. The egg will bind the poppers together, giving them a cohesive structure.
- Using a tablespoon or a small cookie scoop, portion the mixture onto the prepared baking sheet, spacing them about 2 inches apart. Press each portion lightly to form a compact ball; this ensures uniform cooking.
- Brush the tops of each popper with melted butter or olive oil. This step is essential for a shiny, golden crust. The butter also adds a subtle richness that complements the cheddar.
- Bake for 18–22 minutes, or until the poppers are golden brown and the cheese has melted into a glossy center. The edges should pull away slightly, indicating crispness.
- Remove from the oven and let them cool for a minute or two; the cheese inside will be molten, so handle with care. While they’re still warm, sprinkle chopped chives or parsley on top for a fresh finish.
- Serve immediately with your favorite dipping sauce—an aioli, a zesty mustard dip, or a simple ranch. The contrast between the hot poppers and the cool sauce creates a delightful sensory experience.
- If you’re preparing ahead, let the poppers cool completely, then cover and refrigerate. Reheat in a preheated oven at 350°F (175°C) for 10 minutes before serving to restore crispness.
That's it—you did it! But hold on, I've got a few more tricks that'll take this to another level. These small tweaks can transform your poppers from good to unforgettable.
Insider Tricks for Flawless Results
The Temperature Rule Nobody Follows
Many bakers bake at 350°F, but the secret to a crisp exterior lies in a slightly higher temperature of 375°F. This ensures the breadcrumbs brown quickly while the cheese inside stays molten. If you’re using a convection oven, reduce the temperature by 25°F to avoid over‑browning.
Why Your Nose Knows Best
The aroma of the baking poppers is a reliable indicator of doneness. When the smell turns nutty and slightly smoky, you’re at the sweet spot. A faint, sharp smell means they’re undercooked; an overly strong, burnt scent indicates overbaking.
The 5-Minute Rest That Changes Everything
Letting the poppers rest for five minutes after baking allows the cheese to set, preventing a gooey mess when you pick them up. The rest also lets the breadcrumbs firm up, giving a satisfying crunch on every bite.
Use a Silicone Baking Mat
A silicone mat provides a non‑stick surface that eliminates the need for parchment paper and makes cleanup a breeze. The mat also helps distribute heat evenly, ensuring uniform browning.
Keep the Pickles Fresh
If you’re using pre‑cut pickles, check the label for added preservatives. Freshly chopped pickles will deliver a brighter, crisper flavor. Rinsing the pickles before mixing reduces excess salt and keeps the poppers from becoming overly salty.
Serve with a Dip That Matches
A tangy aioli or a spicy mustard dip complements the dill and cheese. If you prefer something cooler, a simple yogurt ranch works beautifully. The right dip enhances the poppers’ flavor profile and adds a refreshing contrast.
Creative Twists and Variations
This recipe is a playground. Here are some of my favorite ways to switch things up:
Spicy Jalapeño Poppers
Add finely diced jalapeños to the mixture for a kick that pairs with the smoky paprika. The heat balances the creamy cheese, creating a bold flavor profile that’s perfect for chili‑con‑carne nights.
Herbed Gouda Version
Swap cheddar for smoked Gouda and add fresh thyme or rosemary to the breadcrumb mix. The nutty Gouda adds depth, while the herbs provide a fragrant aroma that elevates the dish.
Vegan Delight
Use a plant‑based cheese substitute, vegan breadcrumbs, and flaxseed eggs. The result is a creamy, crunchy popper that’s entirely plant‑based yet still satisfies the craving for cheese.
Greek Yogurt Dip
Serve the poppers with a tangy Greek yogurt dip flavored with dill and lemon. The yogurt’s acidity mirrors the dill in the poppers, creating a cohesive flavor experience.
Breakfast Edition
Add diced ham or bacon bits to the mix and top with a sprinkle of chives before baking. These savory poppers pair wonderfully with a side of scrambled eggs for a hearty breakfast.
Gluten‑Free Variation
Replace breadcrumbs with crushed gluten‑free crackers and use a gluten‑free flour blend. The texture remains crisp, and the flavor stays on point, making the dish inclusive for all dietary needs.
Storing and Bringing It Back to Life
Fridge Storage
Cool the poppers completely, then place them in an airtight container. They’ll keep for up to 4 days in the fridge, maintaining their crispness when reheated.
Freezer Friendly
Flash‑freeze the poppers on a parchment sheet before transferring them to a freezer bag. They’ll stay fresh for up to 2 months. Reheat in a preheated oven at 350°F for 10 minutes.
Best Reheating Method
Reheat in a skillet over medium heat for 3–4 minutes per side, or use the oven at 350°F for 8–10 minutes. Adding a tiny splash of water before reheating steams the poppers back to perfection, preserving the cheese’s meltiness.