Boston Cream Pie
I still remember the first time I had Boston Cream Pie - the combination of moist cake, creamy filling, and smooth chocolate was love at first bite. As a gluten-free home cook, I was determined to recreate this classic dessert without sacrificing flavor or texture. After months of experimentation, I finally perfected my recipe, and I'm excited to share it with you.
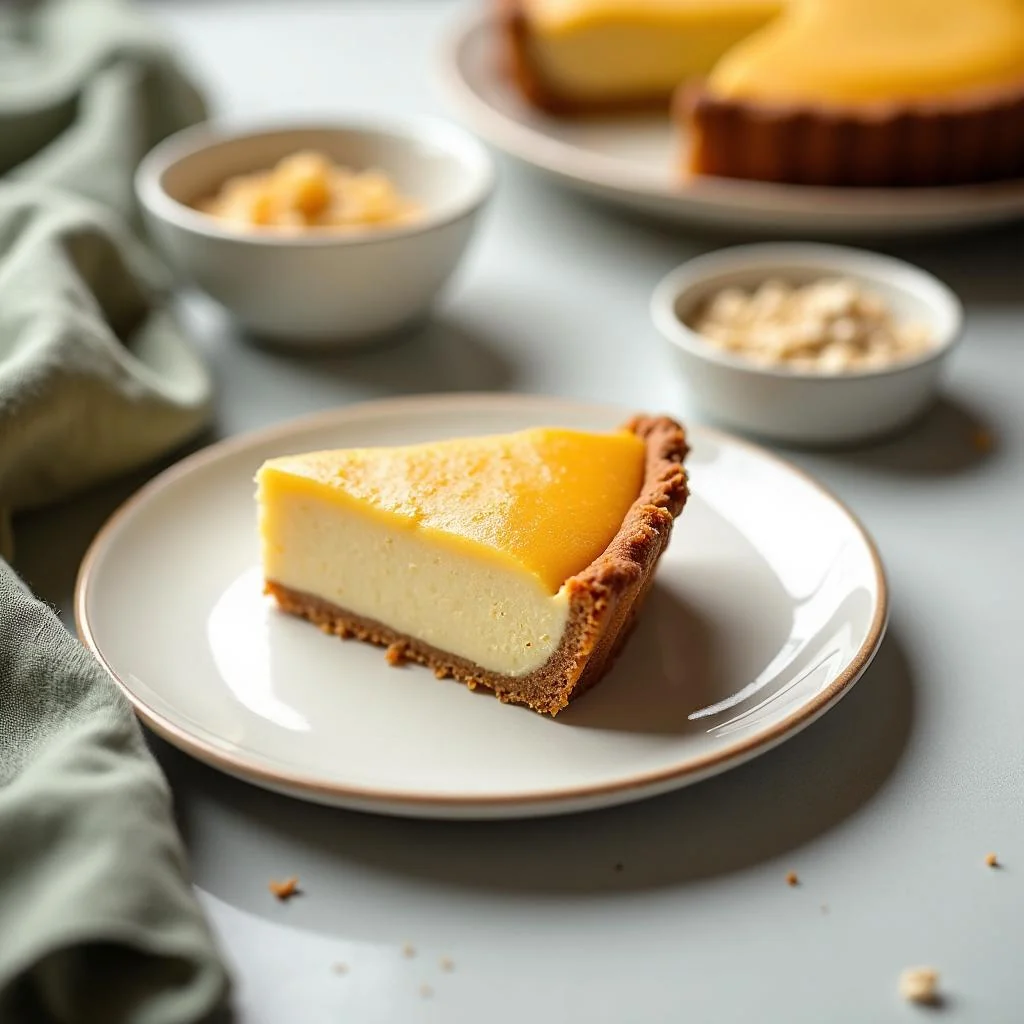
This Boston Cream Pie is a masterclass in balance and restraint, with each component working in harmony to create a truly show-stopping dessert. The cake is tender and fluffy, the custard is rich and creamy, and the chocolate glaze adds a deep, velvety texture. Whether you're a seasoned baker or a beginner, this recipe is sure to impress.
One of the keys to success with this recipe is using high-quality ingredients, particularly when it comes to the chocolate and vanilla. Look for the best-quality chocolate you can find, and don't be afraid to splurge on real vanilla beans - the difference in flavor is well worth the extra cost.
As a gluten-free home cook, I've learned to appreciate the importance of patience and practice in the kitchen. This recipe may require a bit more time and effort than some others, but trust me, the end result is well worth it. So take a deep breath, gather your ingredients, and let's get started on this gluten-free Boston Cream Pie recipe!
With its delicate balance of flavors and textures, this Boston Cream Pie is the perfect dessert for any occasion - from birthdays and anniversaries to holidays and special gatherings. And the best part? It's surprisingly easy to make, as long as you're willing to follow the recipe and take your time. So go ahead, give it a try, and enjoy the ooohs and ahhhs from your friends and family!
Why You’ll Love This Recipe
- This recipe is easy to follow and requires minimal special equipment.
- The gluten-free flour blend is easy to make and can be used in a variety of other recipes.
- The custard is made with simple, everyday ingredients and can be flavored with a variety of extracts and spices.
- The chocolate glaze is easy to make and can be used to top a variety of other desserts.
- This recipe is perfect for special occasions, such as birthdays and anniversaries.
- The cake can be made ahead of time and frozen for up to 2 months.
- The custard can be made ahead of time and refrigerated for up to 24 hours.
Why This Recipe Works
The key to a great Boston Cream Pie is in the balance of flavors and textures. The cake needs to be moist and tender, the custard needs to be rich and creamy, and the chocolate glaze needs to be smooth and velvety. To achieve this balance, I use a combination of high-quality ingredients and careful technique.
First, I start with a gluten-free flour blend that includes rice flour, tapioca starch, and xanthan gum. This blend provides a delicate, tender crumb that's perfect for the cake. I also use a combination of granulated sugar and brown sugar to add depth and complexity to the flavor.
Next, I make the custard using a combination of heavy cream, whole milk, and large egg yolks. The key to a smooth, creamy custard is to cook it slowly and carefully, stirring constantly to prevent the eggs from scrambling. I also add a touch of vanilla extract to the custard to give it a deep, rich flavor.
Finally, I top the cake with a smooth, velvety chocolate glaze made from high-quality dark chocolate and heavy cream. The glaze adds a deep, rich flavor to the cake, and helps to balance out the sweetness of the custard.
Ingredients You’ll Need
To make this Boston Cream Pie, you'll need a few special ingredients, including a gluten-free flour blend, high-quality chocolate, and large egg yolks. You'll also need some basic pantry staples, such as granulated sugar, brown sugar, and heavy cream. Be sure to choose the best-quality ingredients you can find, as they'll make a big difference in the final flavor and texture of the cake.
When shopping for ingredients, be sure to read labels carefully and look for certifications like gluten-free and fair trade. This will help ensure that your ingredients are safe and sustainable.
- 1 1/2 cups (190g) gluten-free flour blendThis blend should include a combination of rice flour, tapioca starch, and xanthan gum. You can make your own blend using 1 cup (120g) rice flour, 1/2 cup (60g) tapioca starch, and 1 teaspoon xanthan gum.
- 1 cup (200g) granulated sugarThis will provide the sweetness and structure for the cake. You can also use a combination of granulated sugar and brown sugar for a deeper flavor.
- 2 large eggs, at room temperatureThese will provide moisture and richness to the cake. Make sure to use room temperature eggs for the best results.
- 2 teaspoons pure vanilla extractThis will add a deep, rich flavor to the cake. You can also use a combination of vanilla extract and other flavorings, such as almond or coconut extract.
- 1/2 cup (120ml) whole milk, at room temperatureThis will provide moisture and tenderness to the cake. Make sure to use room temperature milk for the best results.
- 1/4 cup (60g) unsalted butter, softenedThis will add richness and flavor to the cake. You can also use other types of fat, such as coconut oil or avocado oil.
- 2 large egg yolksThese will provide richness and creaminess to the custard. Make sure to use room temperature egg yolks for the best results.
- 1 cup (240ml) heavy creamThis will provide the base for the custard. You can also use a combination of heavy cream and whole milk for a lighter flavor.
- 1/2 cup (120g) granulated sugarThis will provide sweetness and structure to the custard. You can also use a combination of granulated sugar and brown sugar for a deeper flavor.
- 2 ounces (60g) high-quality dark chocolate, finely choppedThis will provide the flavor and texture for the glaze. You can also use other types of chocolate, such as milk chocolate or white chocolate.
- 1 teaspoon kosher saltThis will add depth and balance to the flavors. You can also use other types of salt, such as sea salt or Himalayan pink salt.
- 1/4 teaspoon ground nutmegThis will add warmth and depth to the flavors. You can also use other types of spices, such as cinnamon or cardamom.
Equipment You’ll Need
How to Make Boston Cream Pie
- 1Preheat the oven to 350°F (180°C) and grease the cake pan with butter or cooking spray.
- 2In a medium bowl, whisk together the flour blend, granulated sugar, and salt.
- 3In a large bowl, whisk together the eggs, milk, and vanilla extract.
- 4Add the dry ingredients to the wet ingredients and whisk until just combined.
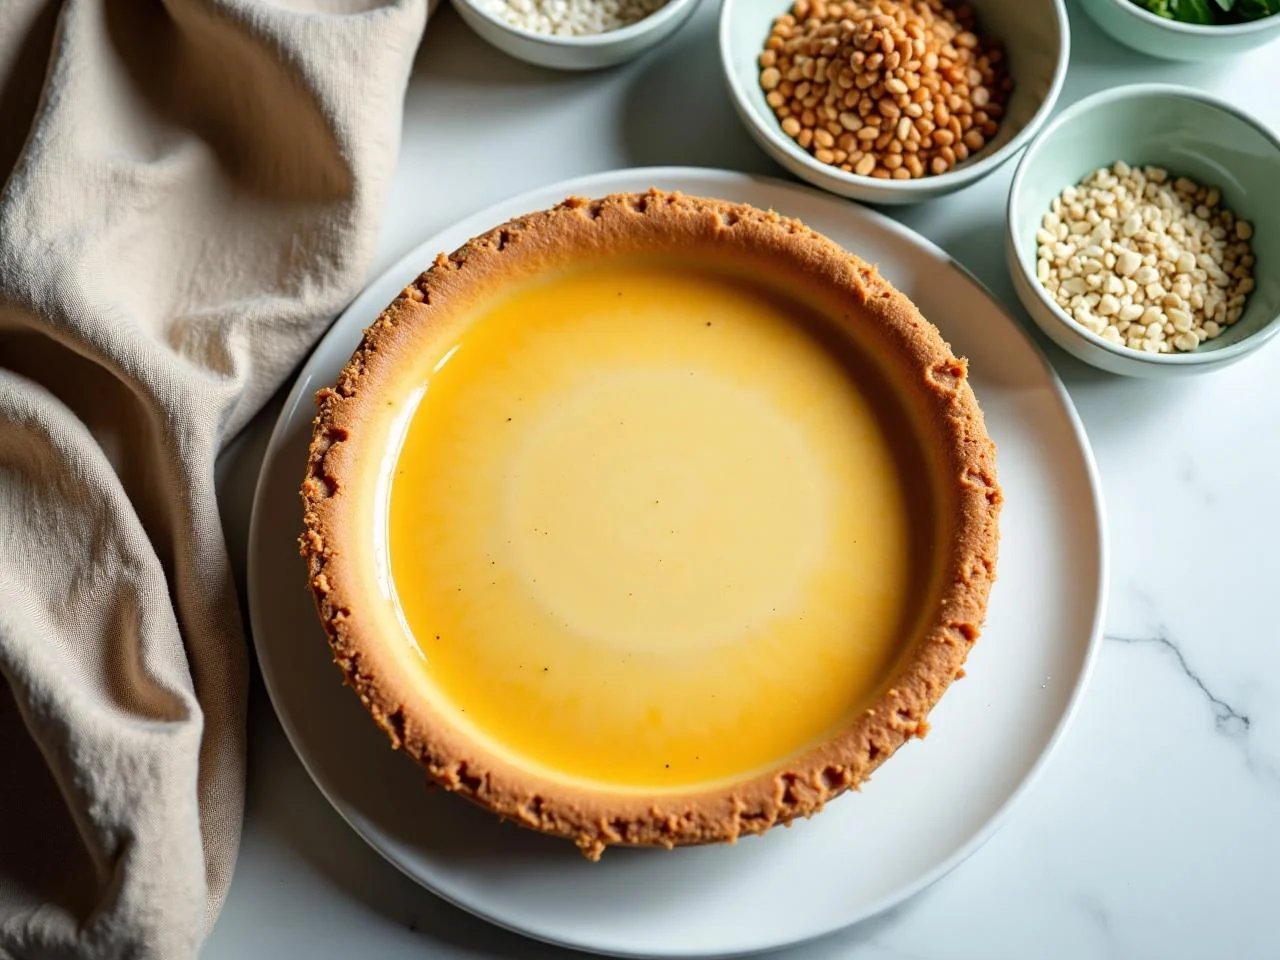
- 5Pour the batter into the prepared cake pan and smooth the top.
- 6Bake for 25-30 minutes, or until a toothpick inserted into the center of the cake comes out clean.
- 7Allow the cake to cool in the pan for 5 minutes, then transfer it to a wire rack to cool completely.
- 8In a medium saucepan, combine the heavy cream, granulated sugar, and kosher salt.
- 9Cook over medium heat, stirring constantly, until the mixture comes to a boil.
- 10In a small bowl, whisk together the egg yolks.
- 11Gradually add the hot cream mixture to the egg yolks, whisking constantly.
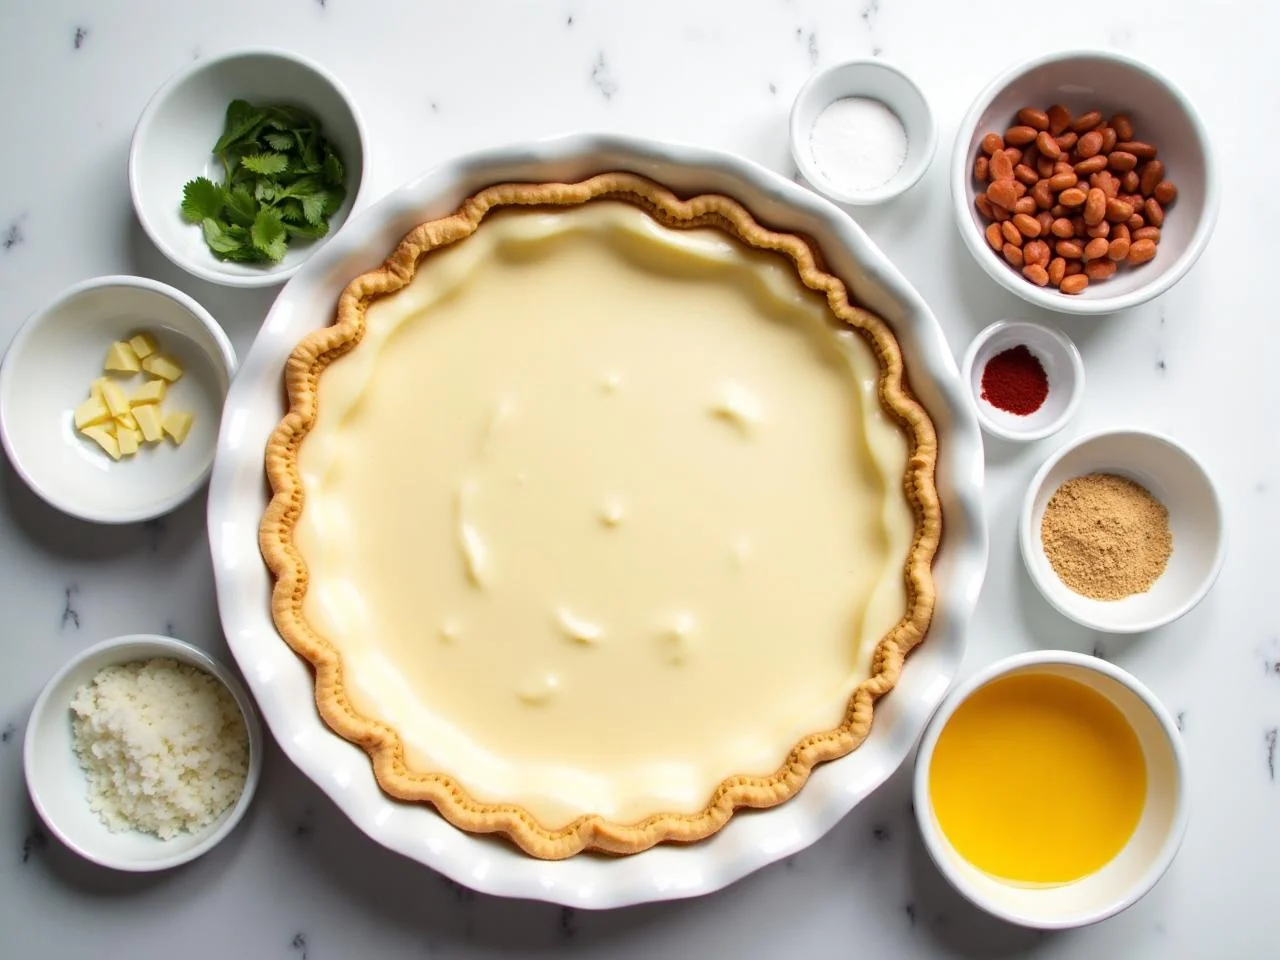
- 12Return the mixture to the saucepan and cook over low heat, stirring constantly, until the custard thickens and coats the back of a spoon.
- 13Remove the custard from the heat and stir in the chopped chocolate until melted and smooth.
- 14To assemble the cake, place one layer on a serving plate and spread a layer of custard on top.
- 15Repeat the layers, ending with a layer of cake on top.
Expert Tips
- Make sure to use room temperature ingredients for the best results.
- Don't overmix the batter, as this can result in a dense cake.
- Use a high-quality chocolate for the glaze, as this will make a big difference in the flavor and texture.
- Don't overcook the custard, as this can result in a thick and scrambled texture.
- Use a sharp knife to cut the cake, as this will help to prevent the cake from tearing.
- Serve the cake chilled, as this will help to set the custard and glaze.
- You can make the cake and custard ahead of time and store them in the refrigerator for up to 24 hours.
- You can also freeze the cake and custard for up to 2 months and thaw them when you're ready to serve.
Common Mistakes to Avoid
- Overmixing the batter, resulting in a dense cake.
- Not using room temperature ingredients, resulting in a cake that doesn't rise properly.
- Overcooking the custard, resulting in a thick and scrambled texture.
- Not using a high-quality chocolate for the glaze, resulting in a flavor and texture that's not rich and smooth.
- Not chilling the cake and custard, resulting in a cake that's not set and a custard that's not firm.
- Not using a sharp knife to cut the cake, resulting in a cake that tears and falls apart.
Variations and Substitutions
- Using different types of flour blends, such as almond flour or coconut flour, to create a gluten-free cake.
- Adding different flavorings, such as vanilla or almond extract, to the cake and custard.
- Using different types of chocolate, such as milk chocolate or white chocolate, for the glaze.
- Adding nuts or fruit to the cake and custard for added texture and flavor.
- Using a different type of milk, such as almond milk or soy milk, to create a dairy-free cake and custard.
- Adding a layer of caramel or dulce de leche to the cake for added flavor and texture.
- Using a different type of sugar, such as brown sugar or honey, to create a different flavor profile.
What to Serve With Boston Cream Pie
This Boston Cream Pie is perfect for serving at special occasions, such as birthdays and anniversaries. You can serve it on its own, or with a scoop of ice cream or a drizzle of chocolate sauce. The cake is also delicious with a cup of coffee or tea, making it a great dessert to serve at brunch or breakfast.
Some other ideas for serving this cake include:
- With a side of fresh fruit, such as strawberries or blueberries.
- With a dollop of whipped cream or a sprinkle of powdered sugar.
- With a side of chocolate-dipped strawberries or truffles.
- With a cup of hot chocolate or coffee.
Make-Ahead, Storage, Freezing and Reheating
This Boston Cream Pie can be stored in the refrigerator for up to 24 hours, or frozen for up to 2 months. To store the cake, place it in an airtight container and refrigerate or freeze. To thaw the cake, simply leave it at room temperature for a few hours or overnight in the refrigerator.
To reheat the cake, simply place it in the microwave for a few seconds or in the oven at 350°F (180°C) for a few minutes. You can also reheat the cake in a toaster oven or on the stovetop in a saucepan with a little bit of water.
Some tips for storing and reheating the cake include:
- Making sure to wrap the cake tightly in plastic wrap or aluminum foil to prevent it from drying out.
- Storing the cake in an airtight container to prevent it from absorbing odors or flavors from other foods.
- Reheating the cake gently, as high heat can cause the cake to dry out or become tough.
- Serving the cake chilled, as this will help to set the custard and glaze.
Frequently Asked Questions
What type of flour blend should I use for this recipe?
You can use a combination of rice flour, tapioca starch, and xanthan gum to create a gluten-free flour blend. You can also use a pre-made gluten-free flour blend, such as Bob's Red Mill or Pamela's Products.
Can I use a different type of milk for the custard?
Yes, you can use a different type of milk, such as almond milk or soy milk, to create a dairy-free custard. Just keep in mind that the flavor and texture may be slightly different.
How do I know when the custard is done?
The custard is done when it thickens and coats the back of a spoon. You can also test the custard by inserting a toothpick into the center - if it comes out clean, the custard is done.
Can I make the cake and custard ahead of time?
Yes, you can make the cake and custard ahead of time and store them in the refrigerator for up to 24 hours or freeze them for up to 2 months.
How do I assemble the cake?
To assemble the cake, place one layer on a serving plate and spread a layer of custard on top. Repeat the layers, ending with a layer of cake on top.
What type of chocolate should I use for the glaze?
You can use a high-quality dark chocolate, such as Ghirardelli or Lindt, for the glaze. You can also use a different type of chocolate, such as milk chocolate or white chocolate, for a different flavor profile.
Can I serve the cake at room temperature?
Yes, you can serve the cake at room temperature, but it's best to serve it chilled, as this will help to set the custard and glaze.
How do I store the cake?
You can store the cake in an airtight container in the refrigerator for up to 24 hours or freeze it for up to 2 months.
Ingredients
- 1 1/2 cups (190g) gluten-free flour blend
- 1 cup (200g) granulated sugar
- 2 large eggs, at room temperature
- 2 teaspoons pure vanilla extract
- 1/2 cup (120ml) whole milk, at room temperature
- 1/4 cup (60g) unsalted butter, softened
- 2 large egg yolks
- 1 cup (240ml) heavy cream
- 1/2 cup (120g) granulated sugar
- 2 ounces (60g) high-quality dark chocolate, finely chopped
- 1 teaspoon kosher salt
- 1/4 teaspoon ground nutmeg
Instructions
- Preheat the oven to 350°F (180°C) and grease the cake pan with butter or cooking spray.
- In a medium bowl, whisk together the flour blend, granulated sugar, and salt.
- In a large bowl, whisk together the eggs, milk, and vanilla extract.
- Add the dry ingredients to the wet ingredients and whisk until just combined.
- Pour the batter into the prepared cake pan and smooth the top.
- Bake for 25-30 minutes, or until a toothpick inserted into the center of the cake comes out clean.
- Allow the cake to cool in the pan for 5 minutes, then transfer it to a wire rack to cool completely.
- In a medium saucepan, combine the heavy cream, granulated sugar, and kosher salt.
- Cook over medium heat, stirring constantly, until the mixture comes to a boil.
- In a small bowl, whisk together the egg yolks.
- Gradually add the hot cream mixture to the egg yolks, whisking constantly.
- Return the mixture to the saucepan and cook over low heat, stirring constantly, until the custard thickens and coats the back of a spoon.
- Remove the custard from the heat and stir in the chopped chocolate until melted and smooth.
- To assemble the cake, place one layer on a serving plate and spread a layer of custard on top.
- Repeat the layers, ending with a layer of cake on top.