I remember the night before the big Easter brunch, the kitchen was a battlefield of flour, sugar, and half‑finished desserts. A stray spoon had slipped from my hand and sent a mound of frosting ricocheting across the counter, landing squarely on a plate of fresh strawberries. The moment the sweet fruit met the white mess, I stared at it and thought, “This is where my obsession with desserts really takes flight.” That single, chaotic splash sparked a new obsession: crafting the perfect no‑bake strawberry cheesecake Easter egg bites that would turn every eye from the table to the center of the kitchen.
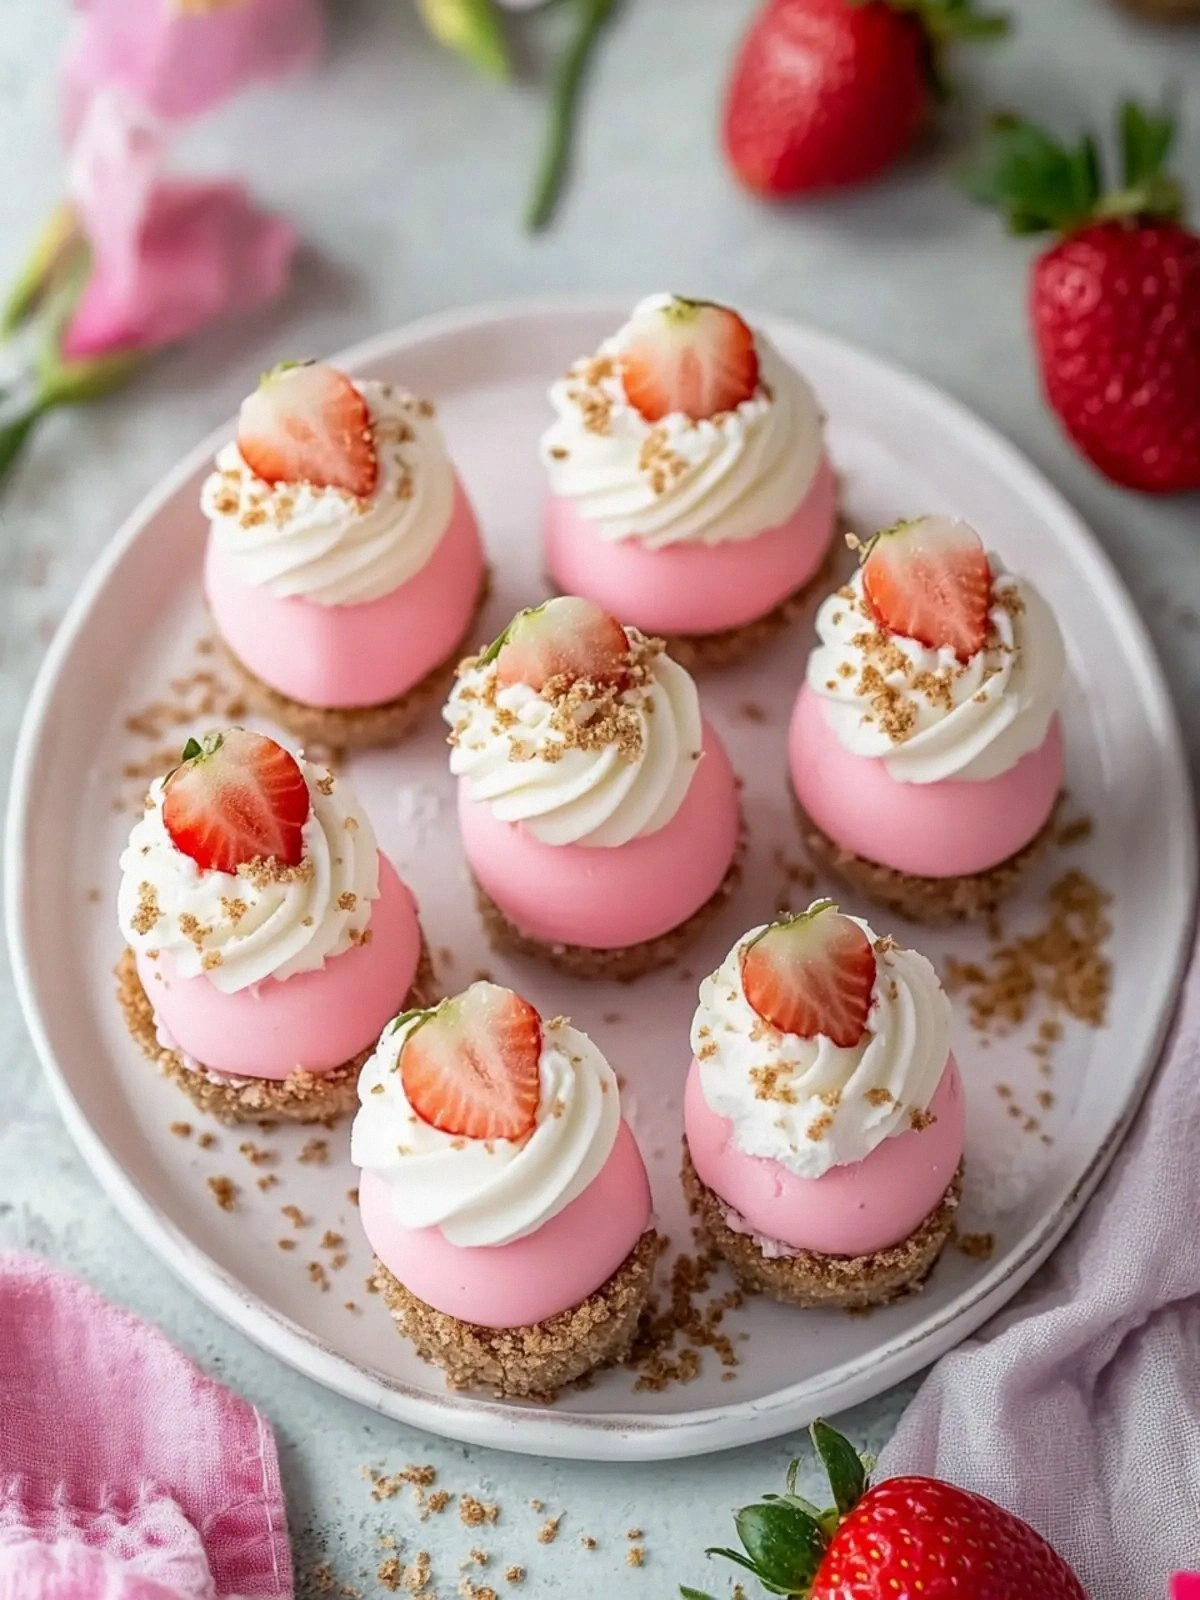
Picture this: a shallow dish lined with parchment, the base of graham cracker crumbs lightly toasted until they smell like sweet caramel, the filling a silky blend of cream cheese, powdered sugar, vanilla, and lemon that glistens under the kitchen light. The strawberries, freshly sliced, add a burst of ruby color and a juicy crunch that cuts through the smoothness of the cheese. When you dip each bite into melted white chocolate, the surface becomes a glossy, pastel shell that shimmers like a tiny, edible sunrise. The final touch of sprinkles or a drizzle of chocolate gives each bite a playful finish that makes you feel like a kid at a candy shop.
What makes this version stand out? It’s not just the flavor; it’s the sheer ease of assembling these treats, the balance between creamy and crunchy, and the visual delight that screams “Easter” without the need for a traditional oven. I’ve spent countless hours tweaking ratios, experimenting with different cheeses, and even trying a vegan version, but none of those iterations captured the same harmonious bite that this recipe delivers. The secret lies in the careful layering of textures and the subtle hint of lemon that brightens the rich creaminess, turning a simple dessert into an unforgettable experience.
And there’s a twist you won’t expect: a splash of pastel food coloring that not only gives the cheesecake a whimsical hue but also enhances the strawberry’s natural sweetness. I dare you to taste this and not go back for seconds—because once you bite into that velvety, strawberry‑laden center, you’ll know you’ve found the ultimate Easter treat. Picture yourself pulling these out of the fridge, the whole kitchen smelling incredible, and the guests’ faces lighting up as they reach for the next bite. Let me walk you through every single step—by the end, you’ll wonder how you ever made it any other way.
What Makes This Version Stand Out
The difference between a good cheesecake and a great one is all in the details, and this recipe nails every one of them.
- Flavor: The creamy filling is brightened by a splash of lemon, cutting through the richness and letting the strawberry shine.
- Texture: The base is a buttery, slightly crunchy graham cracker crust that contrasts beautifully with the silky center.
- Visual Appeal: Pastel food coloring turns the cheesecake into a pastel Easter egg, making it instantly recognizable and Instagram‑worthy.
- Time: No oven required—everything is assembled at room temperature, so you can serve it in a hurry.
- Versatility: Swap white chocolate for dark, add a hint of almond extract, or use fresh blueberries instead of strawberries to keep the base fresh.
- Make‑ahead: The bites can be made up to two days in advance, making them perfect for last‑minute gatherings.
- Kid‑Friendly: The bright colors and fun shape make it a hit with children, while adults appreciate the sophisticated flavor.
- Health‑Friendly: Using fresh strawberries adds vitamins and antioxidants, while the creamy base is still indulgent.
Alright, let’s break down exactly what goes into this masterpiece…
Inside the Ingredient List
The Flavor Base
Cream cheese is the heart of this cheesecake. Its mild tang balances the sweetness of powdered sugar and the bright zing of lemon. If you’re looking for a richer flavor, choose a full‑fat variety. Skipping this step will leave your bites bland and lifeless. For a lighter option, you can blend in Greek yogurt, but be careful—the texture will shift toward a looser consistency.
The Texture Crew
Graham cracker crumbs and melted butter create a crust that’s buttery and slightly crisp. The butter is the secret to binding the crumbs together without turning them soggy. If you prefer a gluten‑free crust, substitute with crushed gluten‑free crackers or almond flour. The granulated sugar sprinkled over the crust adds a subtle caramelized crunch when toasted.
The Unexpected Star
Fresh strawberries are more than just a garnish—they’re an essential flavor component. Their natural acidity cuts the richness of the cream cheese and adds a burst of juiciness. If strawberries aren’t in season, you can freeze them and thaw before use, but be sure to squeeze out excess moisture. A small pinch of salt can enhance their sweetness without making them taste salty.
The Final Flourish
White chocolate chips or candy melts give the bites a glossy, pastel finish. They also add a subtle sweetness that complements the strawberry. If you’re a dark chocolate lover, use dark chocolate for a slightly bitter finish. The food coloring is optional, but a few drops will transform the cheesecake into a vibrant Easter egg. Sprinkles or chocolate drizzle finish the look and add a playful crunch.
Everything's prepped? Good. Let's get into the real action…
The Method — Step by Step
- Toast the Crust: Preheat your oven to 350°F (175°C). Spread the graham cracker crumbs in a thin layer on a parchment‑lined baking sheet. Drizzle with melted butter and sprinkle the granulated sugar evenly. Bake for 8–10 minutes, or until the crumbs are golden and fragrant. Let them cool completely; this step ensures the base has that perfect buttery crunch. I dare you to taste a piece of the crust before adding the filling—it’s the foundation of the whole bite.
- Blend the Filling: In a medium bowl, beat the cream cheese until smooth and creamy. Gradually add the powdered sugar, vanilla extract, and lemon juice, mixing until the mixture is silky and free of lumps. The lemon juice is crucial; it brightens the filling and prevents it from becoming too sweet. If the mixture feels too thick, add a splash of milk or cream to loosen it slightly.
- Incorporate the Strawberries: Roughly chop the strawberries into small, bite‑sized pieces. Gently fold them into the cream cheese mixture, taking care not to mash them. The strawberries should be evenly distributed to provide a juicy burst in every bite. If you prefer a smoother texture, mash the strawberries into a puree before folding.
- Color the Cheesecake: Add a few drops of pastel food coloring to the filling. Start with a small amount, mix well, and add more if you desire a deeper hue. The color not only looks festive but also enhances the strawberry’s natural sweetness. This is the moment where your Easter egg takes on its signature pastel glow.
- Assemble the Bites: Line a muffin tin with paper liners. Spoon the graham cracker crust into each liner, pressing firmly to create a solid base. Spoon the strawberry cheesecake filling on top, filling each cavity about three‑quarters full. The filling should sit on top of the crust, creating a distinct layer. Let the assembled bites chill in the refrigerator for at least 2 hours to set.
- Prepare the Chocolate Coating: Melt the white chocolate chips or candy melts in a double boiler or in the microwave, stirring every 30 seconds until smooth. If you’re using candy melts, keep the mixture warm to avoid hardening. This step is critical; if the chocolate is too hot, it will melt the cheesecake; if it’s too cold, it won’t coat evenly.
- Coat the Bites: Remove the cheesecake bites from the refrigerator. Dip each bite into the melted chocolate, ensuring it’s fully coated. Then, while the chocolate is still wet, roll the bite in sprinkles or drizzle with a thin line of chocolate for extra flair. Place the coated bites back on parchment and let the chocolate set for 10–15 minutes.
- Final Touches: Once the chocolate has hardened, arrange the bites on a serving platter. If you want a glossy finish, lightly brush each bite with a little melted chocolate. Store any leftovers in an airtight container in the refrigerator for up to 3 days.
That’s it — you did it. But hold on, I've got a few more tricks that'll take this to another level…
Insider Tricks for Flawless Results
The Temperature Rule Nobody Follows
The chocolate coating will be flawless if you keep the chocolate at just the right temperature—warm enough to pour but cool enough not to melt the cheesecake. I keep a small bowl of warm water beside the double boiler to test the chocolate’s consistency. If a drop of chocolate runs slowly and thickly, it’s ready. If it runs too thin, it’s too hot. This simple test guarantees a glossy finish every time.
Why Your Nose Knows Best
When you’re assembling the bites, trust your sense of smell. The aroma of toasted graham crackers should be sweet, nutty, and slightly caramelized. If it still smells raw, give it a few more minutes in the oven. A fragrant crust signals that the butter has fully integrated, giving the bites a buttery crunch that’s essential to the overall texture.
The 5‑Minute Rest That Changes Everything
After the chocolate has set, let the bites rest for a full 5 minutes before serving. This short pause allows the chocolate to fully harden, preventing it from softening when the bites are handled. A friend once tried cutting into a bite immediately after coating, and the chocolate melted onto the table. That’s why I always let them sit. It may seem trivial, but it saves your presentation from a chocolate mess.
Keep It Cool, Keep It Fresh
If you’re preparing the bites a day ahead, keep them in the refrigerator at a steady 35°F (1.7°C). When you’re ready to serve, let them sit at room temperature for 10 minutes before coating with chocolate. This small step ensures the filling remains firm, preventing it from sliding off the crust.
Swap the Sweetness
For a slightly tangy twist, add a teaspoon of fresh lime zest to the filling. The citrus pairs beautifully with strawberry and adds a bright note that cuts through the richness. I’ve found that a splash of almond extract also gives a subtle nutty undertone that elevates the flavor profile.
Creative Twists and Variations
This recipe is a playground. Here are some of my favorite ways to switch things up:
Blueberry Bliss
Swap strawberries for fresh blueberries. The slightly tart berry flavor pairs wonderfully with the creamy base, and the blueberries add a pop of blue that complements the pastel chocolate coating.
Almond Crunch
Add a tablespoon of sliced almonds to the graham cracker crust before baking. The toasted nuts introduce a crunchy texture and a nutty flavor that contrasts beautifully with the smooth filling.
Minty Freshness
Incorporate a teaspoon of peppermint extract into the filling. The mint undertone gives the cheesecake a refreshing bite, perfect for a springtime Easter gathering.
Chocolate‑Covered Surprise
Replace the white chocolate with dark chocolate for a richer, bittersweet finish. The dark chocolate’s deep flavor pairs unexpectedly well with the strawberry, creating a sophisticated dessert.
Vegan Edition
Use a plant‑based cream cheese alternative, coconut milk, and a vegan chocolate coating. The result is a dairy‑free version that still delivers on taste and texture.
Nutella Swirl
Stir a tablespoon of Nutella into the cheesecake filling before folding in the strawberries. The chocolate‑hazelnut swirl adds a decadent depth that elevates the whole bite.
Storing and Bringing It Back to Life
Fridge Storage
Keep the finished bites in an airtight container in the refrigerator for up to three days. The airtight seal prevents the chocolate from absorbing fridge odors and keeps the filling firm. When you’re ready to serve, let the bites sit at room temperature for 5–10 minutes to soften slightly.
Freezer Friendly
For longer storage, freeze the bites in a single layer on parchment until solid, then transfer to a freezer bag. They’ll last up to two weeks. When reheating, thaw in the refrigerator overnight, then let them sit at room temperature for 10 minutes before serving. This gentle thaw preserves the texture.
Best Reheating Method
If the chocolate has become brittle after storage, gently warm the bites in a microwave at 20% power for 10–15 seconds. The slight warmth will soften the chocolate without melting the filling. A tiny splash of water added to the chocolate before coating will also help keep it smooth and shiny.