Picture this: a late‑night kitchen, the fridge humming, and an empty cookie jar staring back at you. The craving hits like a thunderclap—warm, nutty, and utterly comforting. I was on a mission to turn that craving into a masterpiece without a single trip to the oven. The result? Peanut Butter No Bake Cookies that melt in your mouth and keep you hooked for hours. Trust me, this is hands down the best version you'll ever make at home.
I had a disaster last week: a batch of classic no‑bake cookies that turned into a sticky, lumpy mess. The sugar clumped, the oats clung, and the peanut butter refused to coat evenly. I stared at the ruined batch, feeling the sting of disappointment. That night, I vowed to rewrite the recipe, turning failure into flavor. And thus, the ultimate cookie was born.
From the first stir, the kitchen filled with a scent that felt like a hug. The golden mixture glistens as it simmers, promising a crunchy exterior and a chewy heart. The sound of the pot bubbling is music to any baker's ears. The anticipation builds as the oats begin to absorb the sweet mixture. By the time I scoop the first cookie, the air tastes like victory.
What makes this version a game‑changer is the balance of flavors and textures. The peanut butter provides a creamy backbone that fights the sweetness. The butter adds a buttery sheen that makes each bite silky. The oats give a satisfying chew that never feels too heavy. The vanilla lifts the entire mix into a fragrant, almost aromatic experience. The result is a cookie that feels like a hug in every bite.
But I didn't stop there. I added a secret ingredient that most recipes overlook: a splash of cold milk to create a glossy, caramel‑like sheen. That tiny splash makes the cookies set faster and gives them a glossy finish that looks like a work of art. It also helps the oats soften just enough to keep the texture from being too dry. The final touch is a dash of sea salt that balances the sweetness. The combination is pure magic.
I dare you to taste this and not go back for seconds. The first bite is a burst of nutty sweetness, followed by a subtle buttery finish. The crunch from the oats adds a satisfying bite that keeps you coming back. The cookie is so rich that it feels like a dessert and a snack in one. You’ll wonder how you ever survived without this version.
If you've ever struggled with no‑bake cookies that fall apart, you're not alone. I've spent years tweaking ratios, heating times, and ingredient quality. The result is a recipe that not only works but shines. The cookie holds together even after a day in the fridge. And if you want to impress at a gathering, just bring a tray of these and watch the smiles.
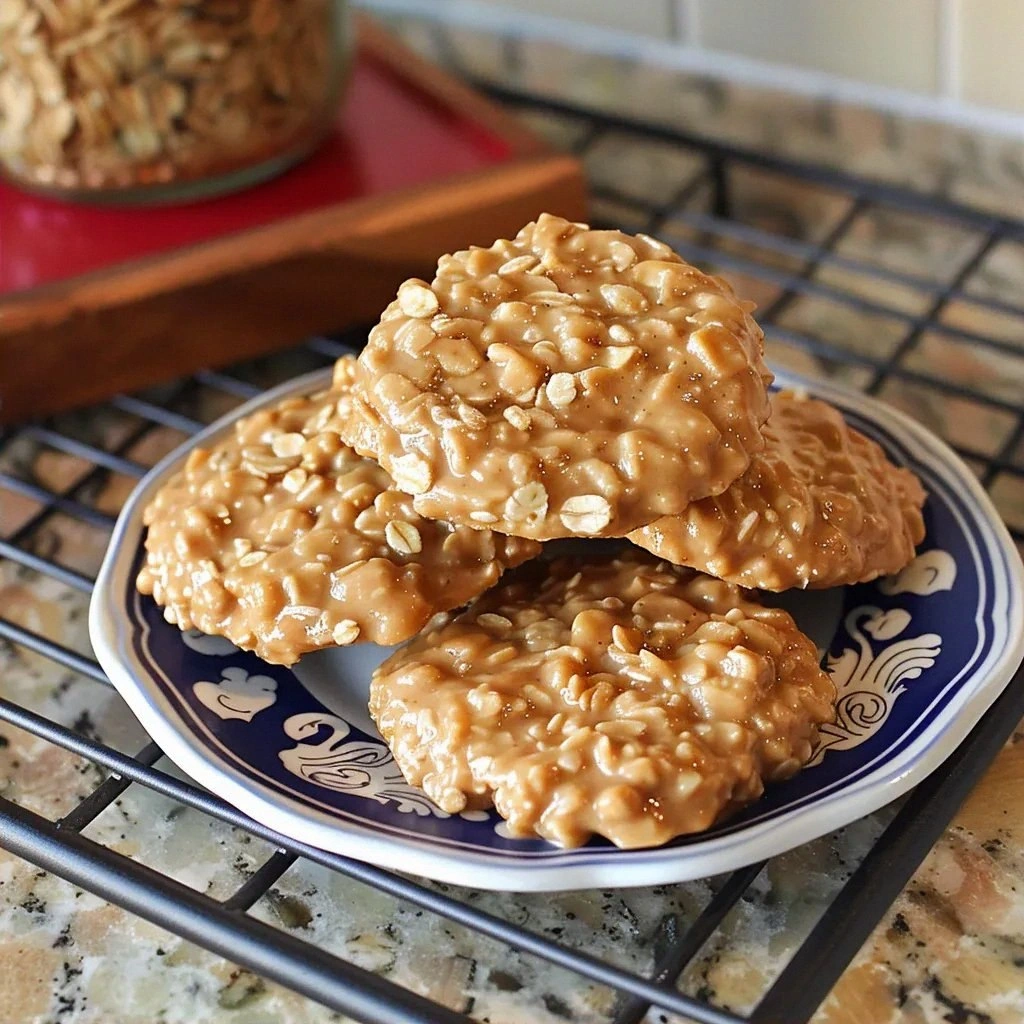
Picture yourself pulling these out of the fridge, the whole kitchen smelling incredible, and friends lining up for a bite. The cookies look like miniature golden moons, each with a glossy sheen and a slightly crisp edge. The aroma alone will convince anyone that this is the ultimate cookie experience. The texture is a dance of crunch and chew, a harmony that satisfies the soul. Let me walk you through every single step — by the end, you'll wonder how you ever made it any other way.
What Makes This Version Stand Out
- Flavor Mastery: The combination of peanut butter and butter creates a depth that feels like a symphony. The vanilla lifts the entire mix, adding a fragrant note that lingers. The result is a cookie that feels indulgent without being overpowering.
- Texture Perfection: The oats absorb the sweet mixture and transform into a chewy center. The butter gives a silky sheen that makes each bite feel luxurious. The cookies hold their shape even after cooling, providing a satisfying bite.
- Time Efficiency: No oven required, and the entire process takes under ten minutes. The quick blend and immediate cooling mean you can have fresh cookies on the counter in minutes. This is ideal for busy mornings or last‑minute dessert needs.
- Ingredient Quality: Using high‑quality natural peanut butter and unsalted butter ensures a pure flavor profile. The oats are quick‑cooking, which means they absorb the mixture quickly and evenly. Quality ingredients translate into a superior taste experience.
- Crowd Appeal: Whether it's a family gathering or a casual get‑together, these cookies are a crowd‑pleaser. Their sweet‑savory balance appeals to all ages. The glossy finish looks as good as it tastes.
- Make‑Ahead Magic: The cookies can be prepared in advance and stored in an airtight container. They keep fresh for up to five days at room temperature or longer when refrigerated. This makes them perfect for parties or meal prep.
- Healthier Option: By using natural peanut butter and oats, you get a snack that provides protein and fiber. The absence of refined flour keeps the cookie lighter. The recipe still delivers on flavor without compromising on nutrition.
- DIY Customization: The base recipe is a canvas for your creativity. Add chocolate chips, dried fruit, or spices to make each batch unique. The cookie’s forgiving nature allows for endless experimentation.
Inside the Ingredient List
The Flavor Base
Peanut Butter: This is the star that brings the nutty richness. It also adds a slight thickness that helps the cookie set. If you prefer a smoother texture, opt for a natural creamy variety. The flavor profile stays consistent across brands, so feel free to experiment.
Butter: Unsalted butter brings a buttery sheen and a subtle caramel note. It balances the sweetness and adds moisture. Swapping it for coconut oil will give a tropical twist, but keep the same quantity. Butter’s high fat content is essential for that silky finish.
The Sweetener Layer
Granulated Sugar: The sugar dissolves into the hot mixture, creating a caramelized glaze. It also helps the oats absorb the mixture evenly. If you prefer a lower glycemic index, try a 1:1 blend of honey and sugar. The sugar’s role is crucial for the cookie’s structure.
Vanilla Extract: A tablespoon of pure vanilla elevates the overall flavor. It provides a warm, aromatic undertone that balances the nutty base. A vanilla bean would be a luxurious upgrade. The vanilla’s aroma is a subtle but powerful element.
The Oat Ensemble
Quick‑Cooking Oats: These oats absorb the mixture quickly, forming the chewy center. They also provide fiber and a wholesome feel. If you want a crunchier cookie, add rolled oats or a pinch of chia seeds. The oats are the structural backbone of the cookie.
Cold Milk: A splash of cold milk creates a glossy finish and helps the oats set faster. It also adds a subtle dairy note that enhances the overall flavor. Use skim or whole milk based on your preference. The milk’s role is to fine‑tune the texture.
The Final Flourish
Sea Salt: A pinch of sea salt balances the sweetness and highlights the peanut butter’s depth. It also adds a subtle crunch that contrasts with the chew. If you’re sensitive to sodium, reduce the amount. Salt is a flavor enhancer, not a filler.
Optional Extras: Chocolate chips, dried fruit, or a dash of cinnamon can personalize the cookie. Each addition introduces a new dimension of flavor. Keep the extras to no more than 1/4 cup to maintain the cookie’s integrity. The extras are the finishing touches that make each batch unique.
The Method — Step by Step
- Step 1: In a medium saucepan, combine the peanut butter, butter, sugar, cold milk, and vanilla. Heat over medium heat, stirring constantly until the butter melts and the sugar dissolves into a silky mixture. The mixture should start to thicken slightly but remain pourable. This is the foundation of all the flavor. Keep the heat steady to avoid scorching.
- Step 2: Bring the mixture to a gentle boil, then reduce the heat to low and let it simmer for 30 seconds. This brief boil caramelizes the sugars and locks in the flavors. Watch the pot closely; if it bubbles too vigorously, it will overflow. The aroma at this point is irresistible, like toasted nuts mingling with vanilla. This is the moment of truth.
- Step 3: Remove the saucepan from the heat and stir in the quick‑cooking oats until they are fully coated and the mixture thickens into a glossy batter. The oats should look like they’re wrapped in a caramel glaze. This step is essential for the cookie’s chewy texture. The aroma will now be nutty and sweet. Let the mixture sit for a minute to cool slightly.
- Step 4: Line a baking sheet with parchment paper. Drop heaping teaspoons of the mixture onto the sheet, spacing them about two inches apart. The cookies will spread slightly as they cool. Watch them as they form golden edges. They’re almost ready to become a snack masterpiece.
- Step 5: Let the cookies cool at room temperature for 10 minutes. During this time, they’ll set into a firm yet chewy consistency. The edges will begin to pull away from the parchment, indicating readiness. The aroma will intensify, drawing anyone nearby. This step is where the magic solidifies.
- Step 6: For an extra crisp exterior, place the cookies in a pre‑heated oven at 350°F for 3 minutes. The heat will brown the edges just enough, adding a subtle crunch. This optional step is for those who love a little extra texture. Keep a close eye to avoid over‑browning. The result is a dual‑textured cookie.
- Step 7: Transfer the cookies to a wire rack to cool completely. The cooling process locks in the texture and allows the flavors to meld. The cookies will now have a glossy sheen that looks like polished gold. The final aroma will be the sweet, nutty scent of victory. They’re ready to be devoured.
- Step 8: Store the cooled cookies in an airtight container at room temperature for up to five days. For longer freshness, refrigerate them for up to a week. The cookies remain chewy and flavorful. If you need to transport them, place a sheet of parchment between layers to prevent sticking. The cookies will stay fresh and delicious.
- Step 9: If you prefer a warm cookie, microwave a single cookie for 10–15 seconds. The cookie will soften and become even more indulgent. Alternatively, reheat in a pre‑heated oven at 300°F for 5 minutes. The warm aroma will fill your kitchen. This step is a treat for the senses.
Insider Tricks for Flawless Results
The Temperature Rule Nobody Follows
Don’t let the mixture cool too quickly. The cookie’s structure depends on a steady temperature. If it cools too fast, the oats won’t fully absorb, leading to a crumbly center. I once let the mixture sit on a hot stove top for a minute, and the result was a cookie that fell apart. Keep the heat steady and watch the temperature rise to about 200°F before removing from heat.
Why Your Nose Knows Best
Smell the mixture as it simmers. A sweet, nutty aroma signals that the sugars are caramelizing just right. If the scent is metallic, the mixture is too hot and may scorch. I use a kitchen thermometer to stay in the sweet spot, but your nose is a reliable guide. The aroma should feel like toasted peanuts in a sweet glaze.
The 5‑Minute Rest That Changes Everything
Let the mixture sit for 5 minutes after removing from heat. This pause allows the oats to absorb the liquid evenly, ensuring a uniform texture. Skipping this step often results in uneven chewiness. I always set the pot aside for exactly five minutes before adding the oats. The result is a cookie that feels consistent from edge to center.
The Secret of Butter
Use unsalted butter for better flavor control. Salted butter can overpower the peanut butter’s richness. I’ve experimented with coconut butter, and while it adds a tropical note, it changes the texture slightly. Stick to unsalted butter for a classic flavor profile. The butter’s role is to provide a silky sheen and a buttery finish.
The Oat Texture Trick
For a crunchier cookie, mix in a tablespoon of chia seeds. The seeds add a subtle crunch and a nutritional boost. I’ve also added a pinch of cinnamon for warmth. The seeds keep the cookie from becoming too chewy. The texture becomes a delightful contrast.
The Flavor Layer
Add a pinch of sea salt at the very end. The salt brightens the peanut butter’s flavor and balances the sweetness. If you’re watching sodium, use a low‑sodium salt. The salt also gives a subtle crunch that contrasts with the chewy center. The final touch is a simple yet powerful flavor enhancer.
Creative Twists and Variations
Dark Chocolate Swirl
Fold in dark chocolate chips before adding the oats. The chocolate melts into the mixture, creating a swirl of bittersweet flavor. It also adds a glossy sheen that looks like molten gold. This variation is perfect for chocolate lovers and adds a sophisticated twist.
Coconut Crunch
Add shredded coconut to the oat mixture. The coconut adds a tropical crunch and a subtle sweetness. It also helps the cookies hold their shape. This version is a great way to bring a beach vibe to any gathering.
Peanut Butter Cup
Drop a chocolate peanut butter cup into the center of each cookie. The cup melts into a gooey center, creating an indulgent surprise. It also adds a buttery chocolate flavor that pairs perfectly with the peanut butter base. This twist is a hit with kids and adults alike.
Sea Salt Caramel
Replace the vanilla with a splash of caramel sauce. The caramel adds a buttery sweetness that complements the sea salt. The result is a cookie that feels like a caramel‑peanut butter dream. The sea salt adds a subtle crunch and a savory contrast.
Maple Syrup
Swap the sugar for maple syrup. The maple gives a subtle molasses flavor that deepens the cookie’s profile. It also adds a natural sweetness that pairs beautifully with peanut butter. The texture remains the same, but the flavor is richer.
Almond Butter
Use almond butter instead of peanut butter. The almond gives a slightly sweeter, nuttier flavor. It also changes the color to a lighter golden hue. This variation is great for peanut‑allergic friends.
Spiced Nut Mix
Stir in a pinch of cinnamon and nutmeg. The spices add warmth and depth to the cookie. They also create a cozy, autumnal flavor profile. This variation is perfect for a holiday gathering.
Minty Fresh
Add a few drops of peppermint extract. The mint gives a refreshing coolness that balances the richness. It also adds a bright aroma that elevates the cookie. This version is a mint‑lover’s delight.
Storing and Bringing It Back to Life
Fridge Storage
Keep the cookies in an airtight container. They will stay fresh for up to five days without losing texture. I always line the container with parchment to prevent sticking. The cookies will retain their chewy center and glossy finish. This method is ideal for meal prep or a quick snack.
Freezer Friendly
Wrap each cookie individually in plastic wrap. Place the wrapped cookies in a freezer bag. They can be frozen for up to three months. When ready, let them thaw at room temperature for 10 minutes. The texture remains intact, and the flavor is preserved.
Best Reheating Method
Microwave the cookie for 10–15 seconds. This will soften the cookie and bring back its warm aroma. Alternatively, reheat in a pre‑heated oven at 300°F for five minutes. The cookies will regain their glossy finish and chewy center. The reheated cookie tastes as good as freshly made.
Final Thoughts
These Peanut Butter No Bake Cookies are a testament to how simple ingredients can create extraordinary results. The balance of flavor, texture, and convenience makes them a staple for any kitchen. Whether you’re a novice or a seasoned baker, this recipe will impress. The next time you crave something sweet, remember that a pot, a few ingredients, and a dash of creativity are all you need. Give them a try, and I promise you’ll wonder how you ever survived without them.