The first time I tried to make Japanese yakitori at home, I was halfway through a batch of skewered chicken and the sauce was a flat, bland syrup that tasted like it had been simmered in a plastic bag for a week. I stared at the pot, wondering if I’d ever get a glaze that could turn a simple cut of meat into a smoky, caramelized masterpiece. That night, I scoured forums, watched a dozen YouTube tutorials, and finally stumbled on a version that promised “the ultimate yakitori” – a dish that would make my friends question their own culinary prowess. I was skeptical, but the aroma of soy, garlic, and ginger that filled my kitchen was enough to convince me that I had found something special.
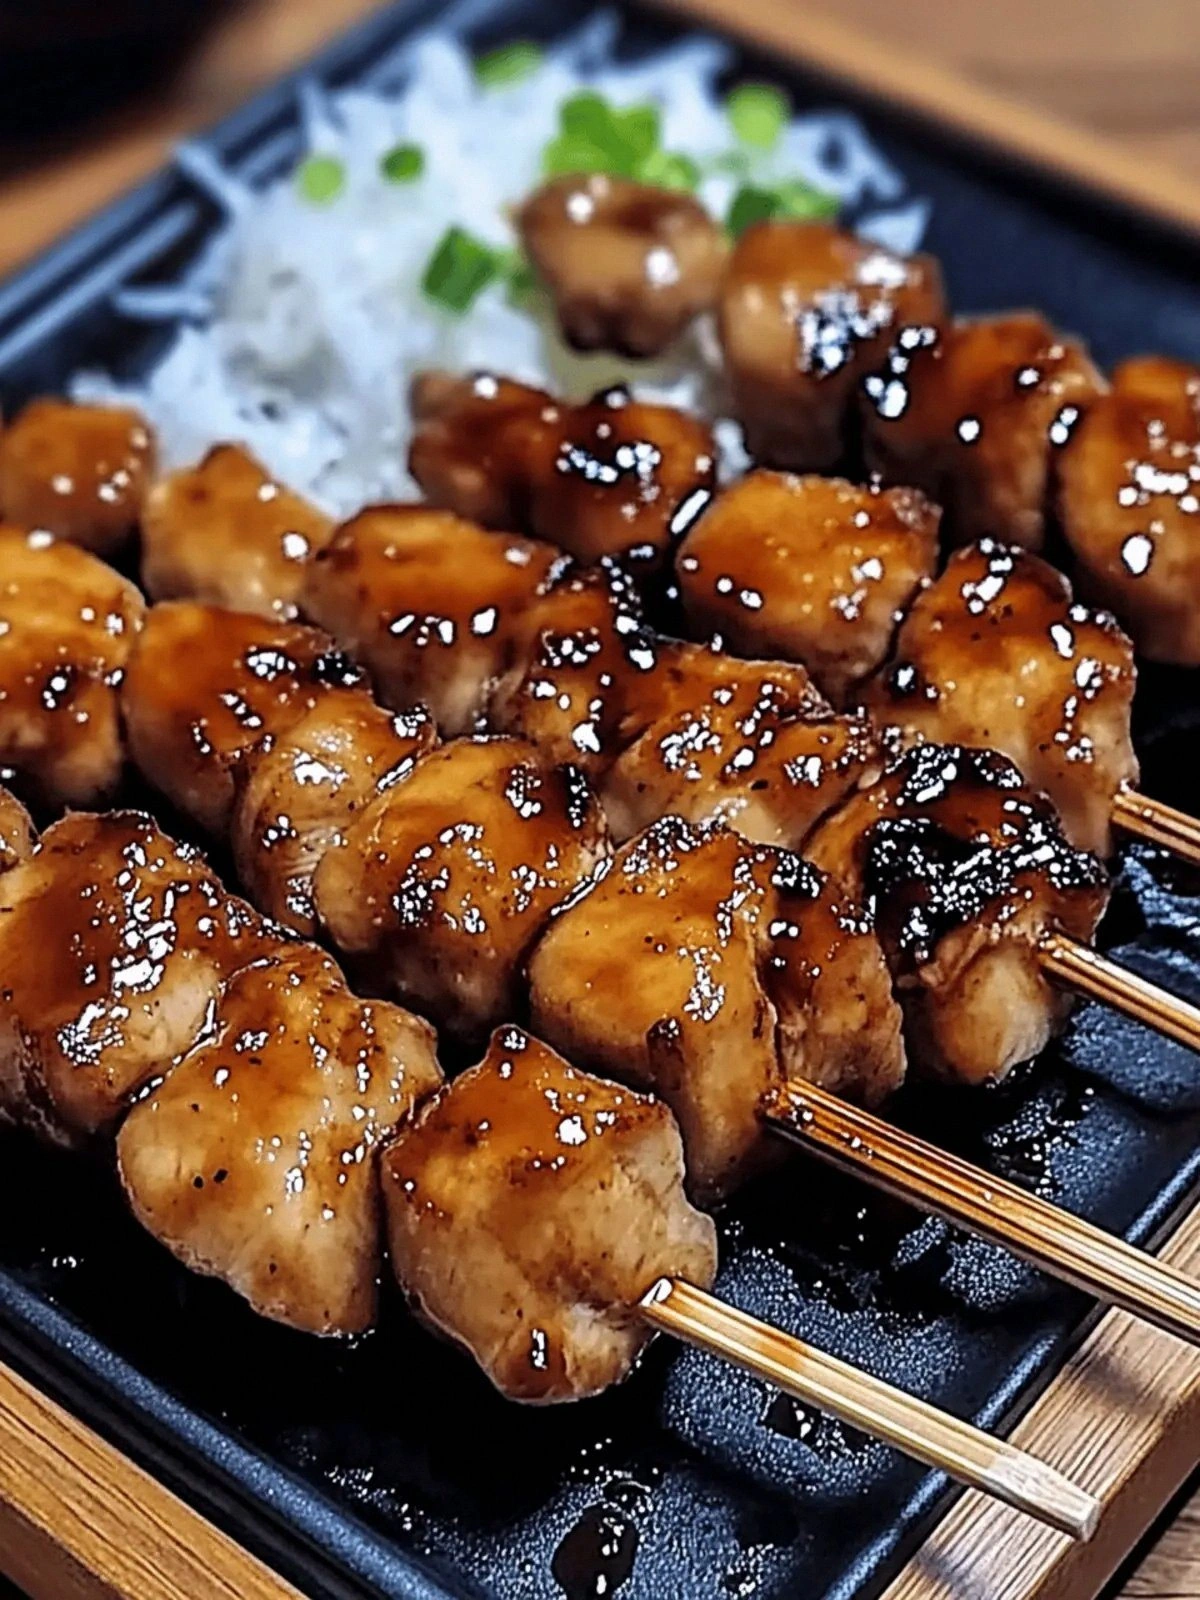
Picture this: a handful of wooden skewers, the chicken pieces glistening with a glossy, amber-brown coating, and the sound of a sizzling pan that feels like a drumline. The first bite delivers a burst of umami, followed by a sweet tang that lingers like a secret handshake. The edges of the meat crisp to a golden perfection, while the inside stays tender and juicy, a contrast that makes every mouthful a new adventure. That sizzle when it hits the pan? Absolute perfection, and it’s the kind of sound that turns a simple dinner into a performance.
What sets this version apart isn’t just the glossy finish or the perfect balance of sweet and salty. It’s the methodical layering of flavors, the precise timing, and the little tricks that make the sauce cling to the chicken like velvet. I dare you to taste this and not go back for seconds, because once you’ve had a piece, the rest of the night feels like a culinary after-party. I’ll be honest – I ate half the batch before anyone else got to try it – and I’m still convinced it’s hands down the best version you’ll ever make at home.
Most recipes get this completely wrong. They either underseason the sauce or overcook the meat, resulting in a dry, flavorless mess that makes you question why you bothered. Here, I’ve broken down each step, from marinating to grilling, so you’ll never make the same mistake again. Picture yourself pulling this out of the oven, the whole kitchen smelling incredible, and knowing that you’ve earned the right to brag about the best yakitori in town. Stay with me here – this is worth it.
What Makes This Version Stand Out
- Flavor: The sauce balances soy, mirin, and a splash of vinegar, creating a sweet-salty profile that’s unmistakably Japanese yet universally appealing. The addition of ginger and garlic injects a punch that keeps the taste from becoming cloying.
- Texture: The chicken is marinated just enough to stay moist, then seared to a caramelized crust that cracks like thin ice when you bite into it.
- Simplicity: With only ten ingredients and a handful of steps, you can achieve restaurant-quality results without a pantry full of exotic spices.
- Uniqueness: The use of red wine or mirin in the sauce gives it a depth that’s rare in typical yakitori recipes, providing a subtle fruitiness that elevates the dish.
- Crowd Reaction: Friends and family will ask for the recipe after the first bite, and you’ll be the hero who delivered an unforgettable meal.
- Ingredient Quality: By using fresh ginger and high-quality soy sauce, you’re investing in flavor that will carry through each bite.
- Cooking Method: The combination of stovetop searing and optional finishing on a grill adds layers of smokiness that are hard to replicate otherwise.
- Make‑Ahead Potential: The marinated chicken can be prepared up to 24 hours ahead, allowing you to focus on the final searing when your guests arrive.
Inside the Ingredient List
The Flavor Base
Soy sauce is the backbone of this sauce, delivering that classic umami punch that defines Japanese cuisine. A half cup per batch is enough to coat the chicken without drowning it, and it’s the base that allows the other flavors to shine. If you’re watching sodium, swap the soy sauce for low‑sodium or tamari; the taste stays robust, just a touch lighter.
Water is the secret to achieving the right consistency. Adding a quarter cup keeps the glaze from becoming too thick, ensuring it clings to the meat like a second skin. Skipping water will result in a syrupy mess that clutters the grill and makes cleanup a nightmare.
Red wine or mirin brings a subtle sweetness and a hint of acidity that cuts through the richness of the chicken. If you prefer a purely Japanese flavor, mirin is the way to go; for a slightly deeper, fruity note, choose a dry red wine. Either option works, but don’t forget the splash of vinegar to balance the sweetness.
The Texture Crew
Brown sugar is the sweetener that caramelizes into a glossy glaze. One tablespoon is enough to give that irresistible sheen; too much sugar will burn and turn the sauce bitter. If you’re avoiding refined sugar, try coconut sugar or a touch of maple syrup – just be prepared for a slightly different caramelization profile.
Vinegar adds a bright, acidic lift that cuts the fat and balances the sweetness. A tablespoon of rice vinegar works best; avoid distilled white vinegar, which will overpower the delicate flavors. If you’re allergic to vinegar, lemon juice can be a substitute, but adjust the amount to keep the glaze from becoming too tart.
Ground pepper and ginger are the heat and aroma that keep the dish from being flat. A teaspoon of each is sufficient to add depth without overwhelming the chicken. For a spicier kick, add a pinch of cayenne or a few drops of sriracha to the sauce.
The Unexpected Star
Minced garlic is the flavor enhancer that ties everything together. Two cloves are enough to infuse the sauce with a warm, savory note that lingers on the palate. If you’re sensitive to garlic, use a garlic press to extract the essence without the raw bite, or replace it with garlic powder for a milder profile.
The Final Flourish
Chicken is the star of the show, and using thigh or breast makes a difference. Thighs offer a richer, juicier experience, while breasts keep the dish leaner. Whichever you choose, cut the meat into bite‑sized cubes to ensure even cooking and maximum surface area for the glaze.
Wooden skewers are essential for that authentic yakitori look. Soak them for at least 30 minutes to prevent burning, and use a set that’s long enough to hold the chicken pieces without overcrowding. If you’re short on time, pre‑soaked skewers are available at most grocery stores.
Everything’s prepped? Good. Let’s get into the real action.
The Method — Step by Step
- Start by mixing the soy sauce, water, red wine or mirin, brown sugar, vinegar, minced garlic, ginger, and ground pepper in a shallow bowl. Stir until the sugar dissolves, creating a smooth, fragrant sauce. This is the flavor base that will coat every piece of chicken and give it that signature sheen.
- Add the diced chicken to the sauce, making sure each cube is fully submerged. Let the chicken marinate for at least 30 minutes, or up to 24 hours if you’re making it ahead. The longer it marinates, the more the flavors penetrate the meat, resulting in a deeper taste.
- Soak the wooden skewers in water for 30 minutes before threading the chicken. This prevents the skewers from catching fire on the grill or pan. Thread the marinated chicken onto the skewers, leaving a small gap between each piece so the sauce can circulate.
- Heat a non‑stick skillet or cast‑iron pan over medium‑high heat. Add a splash of oil with a high smoke point, such as grapeseed or canola, to prevent sticking.
- Place the skewers in the pan, cooking for 2–3 minutes per side. As the chicken starts to sear, brush the remaining sauce onto the skewers. The sauce will caramelize, forming a glossy glaze that clings to the meat.
- Once the first side is browned, flip the skewers and repeat the brushing process. Continue cooking until the chicken is cooked through and the glaze is thickened, about 5–7 minutes total. The aroma should be intoxicating, a hint of sweet, smoky, and savory all at once.
- If you prefer a smoky finish, transfer the skewers to a preheated grill set to medium. Sear each side for 30 seconds, brushing with sauce as you go. This step adds a subtle char that enhances the overall flavor profile.
- Remove the skewers from heat and let them rest for 2 minutes. This allows the juices to redistribute, ensuring each bite is juicy and tender.
- Serve the yakitori hot, accompanied by steamed rice, a simple cucumber salad, or a side of miso soup. Garnish with chopped scallions or sesame seeds for an extra pop of color and flavor.
- Enjoy your masterpiece. Remember, the secret to an unforgettable yakitori lies in the balance of sweet, salty, and smoky. If you’re craving more, try a drizzle of sesame oil or a sprinkle of furikake for an extra layer of umami.
Insider Tricks for Flawless Results
The Temperature Rule Nobody Follows
Many cooks think medium heat is enough, but the secret lies in medium‑high heat that allows the surface to caramelize without overcooking the interior. Keep the flame steady and let the pan preheat fully before adding the skewers. If the pan is too hot, the sugar will burn; if it’s too cool, the glaze won’t set.
Why Your Nose Knows Best
Before you flip the skewers, listen for the subtle crackle of the glaze. That sound signals the perfect moment to turn the meat. If you wait too long, the sauce will burn; if you flip too early, the glaze won’t develop its glossy sheen.
The 5‑Minute Rest That Changes Everything
Resting the skewers for exactly five minutes after cooking allows the juices to redistribute. This small step prevents the meat from drying out and ensures each bite is moist. A friend tried skipping this step once, and the result was a dry, chewy mess that nobody wanted to finish.
The Secret of the Final Glaze
Finish the sauce by adding a teaspoon of honey or a splash of sesame oil at the very end. The honey caramelizes to a glossy finish, while sesame oil adds a nutty aroma that elevates the dish. This final touch turns an ordinary yakitori into a gourmet experience.
The Skewer Trick
If you’re using a grill, keep a small bowl of water on the grill to spray onto the skewers as they cook. This prevents flare‑ups and keeps the glaze from drying out. The result is a consistently caramelized coating that’s both flavorful and visually stunning.
Creative Twists and Variations
Spicy Sriracha Kick
Add a tablespoon of sriracha to the sauce for a fiery twist that pairs well with the sweet glaze. The heat balances the sweetness, creating a dynamic flavor profile that will keep your guests coming back for more.
Teriyaki Fusion
Replace the mirin with a splash of teriyaki sauce for a richer, more complex sweetness. This variation gives the yakitori a deeper caramelized color and a slightly thicker glaze.
Citrus Brightness
Squeeze fresh lemon or yuzu juice into the sauce just before serving. The citrus zest adds a bright, refreshing note that cuts through the richness of the chicken.
Vegetable Sidekick
Thread sliced bell peppers, onions, or shiitake mushrooms onto the skewers for a colorful, nutrient‑rich addition. The veggies absorb the sauce, creating a harmonious blend of textures.
Gluten‑Free Option
Use tamari or coconut aminos instead of soy sauce for a gluten‑free version that doesn’t compromise on flavor. The sauce will still caramelize beautifully, offering the same satisfying glaze.
Ginger‑Lemon Twist
Increase the ginger to two teaspoons and add a tablespoon of fresh lemon zest to the sauce. The ginger’s warmth pairs with the lemon’s bright acidity, creating an unexpected yet delightful flavor profile.
Storing and Bringing It Back to Life
Fridge Storage
Store leftover yakitori in an airtight container in the refrigerator for up to three days. Keep the sauce in a separate small jar to prevent the chicken from becoming soggy. When reheating, lightly drizzle the sauce back onto the skewers for a fresh glaze.
Freezer Friendly
For longer storage, freeze the chicken pieces in a single layer on a baking sheet, then transfer to a freezer bag. They’ll keep for up to two months. Thaw overnight in the refrigerator before reheating.
Best Reheating Method
Reheat the yakitori in a preheated oven at 350°F for 10 minutes, or use a skillet over medium heat, brushing with a splash of water to keep the glaze moist. Add a tiny splash of water before reheating to steam back to perfection, and the chicken will taste almost as fresh as when it was first cooked.