Picture this: a midnight kitchen raid, a stray bag of chicken breasts, and the sweet promise of honey. The moment I cracked the first egg, my stomach roared louder than a drumline, and the air filled with the scent of garlic sizzling in olive oil. I had been chasing a flavor profile that would make my friends swoon, and this dish promised a silky glaze that would melt on the tongue like a summer breeze. My kitchen, a chaotic symphony of pans and gadgets, became the stage for a culinary experiment that would soon turn into a legend. I dared myself to create something that would leave a lingering sweetness and savory depth that no other recipe could match. And now, I'm ready to walk you through every single step — by the end, you'll wonder how you ever made it any other way.
From the first crack of the pan to the final drizzle of parsley, every sensory cue was a clue to perfection. The clink of stainless steel, the hiss of oil, and the aroma of garlic dancing with honey were the soundtrack of my kitchen. I watched the sauce thickening, its glossy sheen reflecting the overhead lights like a polished trophy. The sound of the chicken searing was a satisfying pop that promised a caramelized crust. As the flavors mingled, the air became a heady mix of sweet, umami, and herbaceous notes that made my mouth water. I could almost taste the bite of the first bite, the tender meat kissed by a glaze that clung like a second skin.
This version stands out because it balances the sweetness of honey with the briny punch of soy sauce, creating a harmony that feels both familiar and adventurous. The key is the cornstarch slurry, which gives the sauce a silky viscosity without overpowering the delicate flavors. I discovered that a splash of water during the final simmer keeps the glaze from drying out and ensures every bite is coated in lusciousness. Most recipes get this completely wrong by overcooking the chicken or using too much honey, but this method keeps the meat moist and the sauce just thick enough to cling. The result is a dish that feels like a hug in a bowl, with a texture that’s juicy on the inside and slightly caramelized on the outside. If you've ever struggled with sticky sauces, you're not alone — and I've got the fix.
Picture yourself pulling this out of the pan, the whole kitchen smelling incredible, and a plate of golden chicken ready to be devoured. The first bite will melt your heart, the glaze will coat your tongue, and the subtle crunch of the crust will linger like a sweet aftertaste. I dare you to taste this and not go back for seconds, because once you experience this flavor explosion, you'll know there's no other chicken dish that can compete. This is hands down the best version you'll ever make at home, and I guarantee it will become a staple in your culinary repertoire. I confesses that I ate half the batch before anyone else got a chance to try it. Stay with me here — this is worth it.
What Makes This Version Stand Out
- Flavor Harmony: The marriage of honey and soy sauce creates a sweet‑savory balance that feels both comforting and daring. This duo forms the backbone of the sauce, allowing each bite to oscillate between caramelized sweetness and umami depth. The result is a glaze that feels like a velvet blanket over tender chicken. It’s a flavor profile that will have your taste buds dancing with delight.
- Texture Mastery: The cornstarch slurry thickens the sauce to a silky consistency without turning it into a gummy mess. It coats the chicken like a second skin, giving each bite a satisfying bite that melts in your mouth. The crust develops a subtle crunch that contrasts beautifully with the juicy interior. This duality is what makes the dish unforgettable.
- Simplicity in Steps: With only ten straightforward steps, this recipe is perfect for busy weeknights or a relaxed weekend dinner. No fancy techniques or obscure ingredients are required, yet the outcome feels restaurant‑grade. The process is streamlined, making it ideal for both novices and seasoned cooks.
- Ingredient Quality: Using high‑quality, low‑sodium soy sauce and fresh garlic ensures that the sauce’s flavor is bright and not cloying. The olive oil adds a subtle fruity note that elevates the dish. Each ingredient is chosen to complement the others, creating a cohesive flavor tapestry.
- Crowd‑Pleasing: Friends and family will be amazed when you serve this dish. The sweet glaze is instantly recognizable, while the savory undertones keep it from feeling like a gimmick. It’s a guaranteed conversation starter at dinner tables.
- Make‑Ahead Friendly: Once the sauce is ready, you can refrigerate the chicken for up to 48 hours. Reheat gently to maintain juiciness and glaze integrity. This flexibility makes it a go‑to meal prep option.
- Low‑Fat Twist: By using olive oil and limiting added fats, the dish stays lighter than typical fried chicken recipes. The honey provides natural sweetness without the need for excessive butter or cream. It’s a healthier choice that doesn’t compromise on flavor.
- Glaze Perfection: The glaze is the star of the show, with a glossy sheen that invites you to take another bite. Its thickness is just right—thick enough to cling but thin enough to be spreadable. The finish is a glossy, caramelized coat that will have you reaching for a second helping.
Alright, let's break down exactly what goes into this masterpiece. The next section will walk you through each ingredient, explaining why it matters and how it shapes the final dish. We'll also dive into swaps and alternatives for those who want to tweak the flavor or accommodate dietary needs. Every component is essential, but you’ll see how some can be swapped without losing the magic. By the end, you’ll have a clear understanding of how each element contributes to the overall experience. This knowledge will empower you to adapt the recipe to your personal taste. And trust me, once you master this, you’ll never look back.
Inside the Ingredient List
The Flavor Base
Honey is the sweet heart of this dish, providing a natural syrup that caramelizes beautifully. Its floral notes contrast with the savory soy sauce, creating a balanced flavor profile that’s both comforting and bold. When you pour it into the pan, watch it bubble and turn amber, signaling that it’s ready to coat the chicken. If you prefer a slightly tart edge, replace half the honey with maple syrup; the result is a subtle tang that complements the soy. This base is essential; skipping it would leave the sauce bland and flat, like a plain toast.
The Texture Crew
Cornstarch is the unsung hero that gives the glaze its silky texture. By mixing it with water, you create a slurry that thickens without clumping, ensuring a smooth finish. The cornstarch also helps the sauce cling to the chicken, preventing it from sliding off when you plate. If you’re gluten‑free, opt for arrowroot powder instead; it behaves similarly and gives a clear finish. Remember, a little goes a long way—too much cornstarch can make the sauce gummy.
The Unexpected Star
Fresh parsley isn’t just a garnish; it adds a pop of color and a fresh herbal note that cuts through the sweetness. The bright green specks create a visual contrast that makes the dish look as good as it tastes. Parsley also carries subtle peppery undertones that enhance the overall flavor. If you’re not a fan of parsley, try cilantro for a citrusy twist or basil for a sweeter finish.
The Final Flourish
Olive oil is the medium that brings everything together, allowing the garlic to release its aroma without burning. The oil’s fruity undertones add depth to the glaze, elevating the dish from simple to sublime. The oil also helps the chicken develop a golden, slightly crisp exterior. If you prefer a lighter oil, use grapeseed or avocado oil; they have higher smoke points and will keep the sauce from scorching. The final flourish is what turns a good dish into an unforgettable one.
Everything's prepped? Good. Let's get into the real action and start cooking. I promise you, the aroma alone will have you salivating before the first bite. Keep an eye on the heat and the sauce’s consistency, and you’ll be rewarded with a dish that’s both elegant and comforting. The process is straightforward, but the results are extraordinary. Follow each step carefully, and you’ll create a dish that will become a family favorite. Trust me, the final product will be worth every minute you invest in it.
The Method — Step by Step
- Step 1: Prepare the Chicken Pat each breast dry with paper towels to remove excess moisture; this step ensures a crisp sear. Season both sides with dried oregano, black pepper, and a pinch of salt for a subtle savory base. The seasoning will penetrate the meat, creating layers of flavor that unfold as it cooks. If you like a bit of heat, sprinkle a dash of red pepper flakes at this point. This foundational step sets the tone for the entire dish.
- Step 2: Sear the Breasts Heat olive oil in a large skillet over medium‑high heat until it shimmers. Add the chicken breasts, skin‑side down, and let them cook undisturbed for 4–5 minutes until a golden crust forms. Flip carefully, then cook for an additional 3–4 minutes, ensuring the internal temperature reaches 165°F. The sizzling sound is a cue that the exterior is caramelized and ready to absorb the sauce. This step locks in juices and builds a flavorful base.
- Step 3: Infuse with Garlic Reduce heat to medium and add minced garlic to the pan. Sauté for 30 seconds, letting the aroma bloom without letting the garlic burn. The garlic releases a sweet, aromatic essence that permeates the chicken. This brief sauté is crucial for depth; too long and you’ll get bitterness, too short and you’ll miss the flavor. Now that the chicken is seared and fragrant, the sauce is ready to shine.
- Step 4: Create the Glaze In a small bowl, whisk together honey, soy sauce, and a splash of water. The water helps balance the sweetness and prevents the sauce from becoming too thick. Stir until the mixture is smooth and glossy. Pour the glaze over the chicken, ensuring each piece is coated evenly. The glaze will bubble and thicken as it simmers, creating a velvety coat.
- Step 5: Thicken the Sauce Mix the cornstarch with an additional tablespoon of water to form a slurry. Stir this into the pan, then let the sauce simmer for 2–3 minutes until it thickens to a silky consistency. The cornstarch will activate, giving the glaze body without a gritty texture. Watch the sauce thicken; it should coat the back of a spoon. This is the moment of truth, where the sauce transforms from liquid to luscious.
- Step 6: Finish with Parsley Sprinkle freshly chopped parsley over the glazed chicken. The parsley adds a burst of color and a fresh herbal note that balances the sweetness. It also provides a slight peppery contrast that brightens the dish. Let the parsley sit for a minute so it releases its oils. This final touch elevates the presentation and flavor profile.
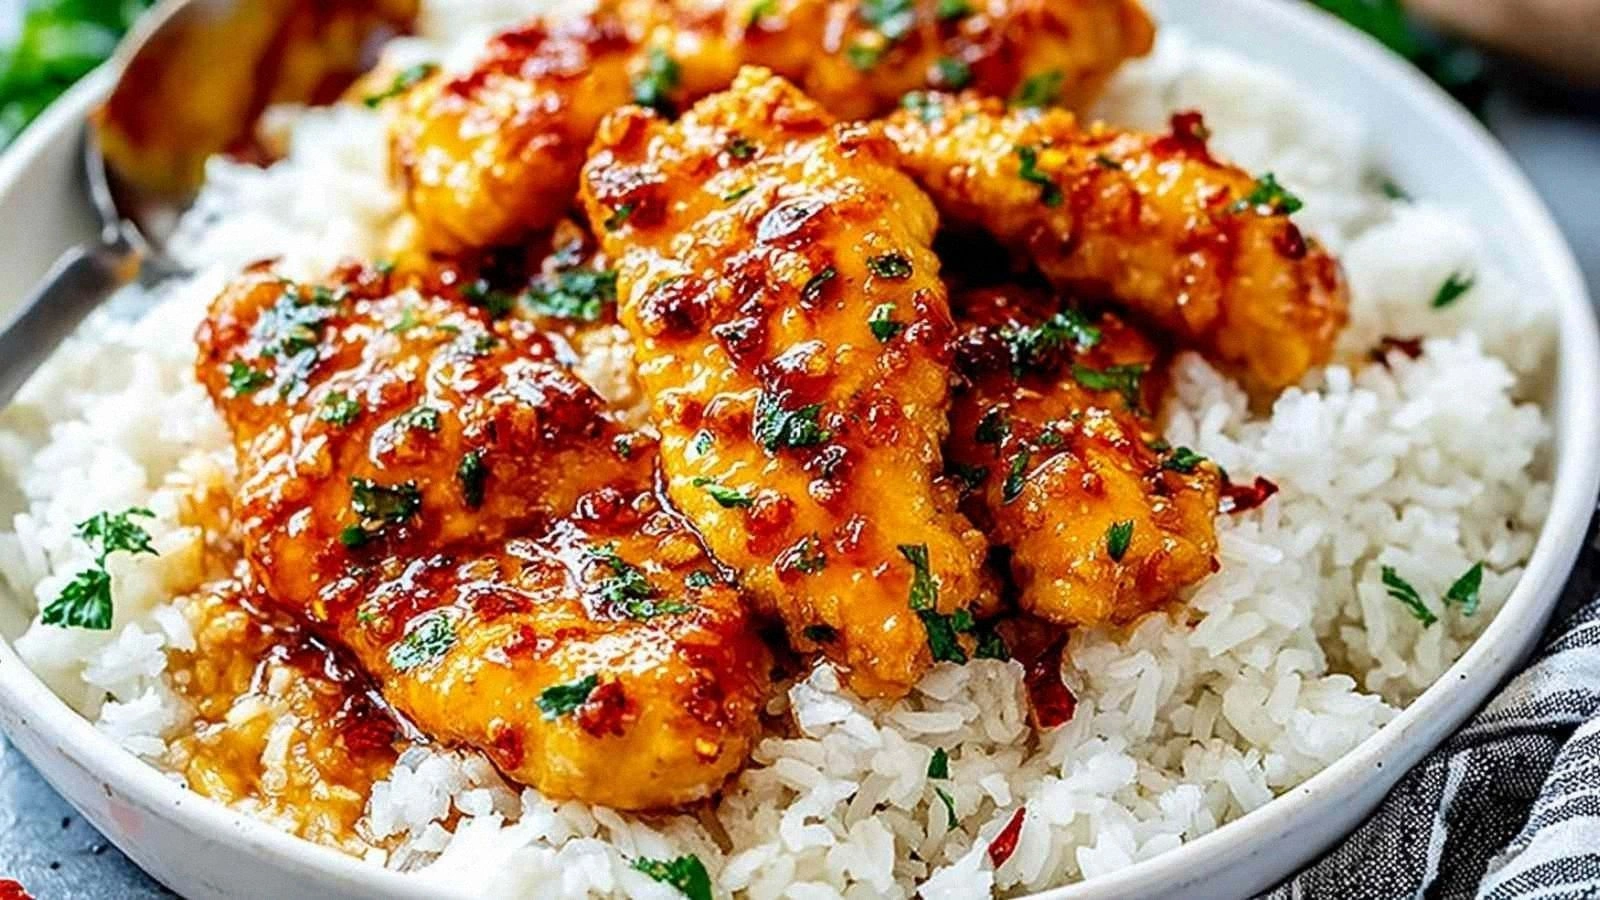
- Step 7: Plate and Serve Transfer the chicken to a serving platter, ensuring each piece is glistening with the caramelized glaze. Arrange the remaining sauce on the side or drizzle it over the top for extra flavor. Garnish with a few whole parsley leaves for a polished look. Serve immediately with rice, noodles, or a fresh salad. The dish is ready to impress.
- Step 8: Store or Reheat If you have leftovers, let the chicken cool completely before refrigerating in an airtight container for up to 48 hours. To reheat, gently warm in a skillet or microwave, adding a splash of water to restore moisture. The glaze will soften slightly, but the flavor remains intact. This makes it a convenient option for meal prep or a quick dinner solution. Enjoy the leftovers as a tasty lunch or dinner.
That’s it — you did it. But hold on, I've got a few more tricks that'll take this to another level. From adjusting the glaze thickness to mastering the sear, these insider secrets will help you perfect the dish every time. I’ll share my personal anecdotes and practical advice to ensure you never encounter the same pitfalls again. The next section will dive deeper into these nuances, giving you the edge to wow any crowd.
Insider Tricks for Flawless Results
The Temperature Rule Nobody Follows
Many cooks assume that a high heat is always best for searing, but too high can burn the exterior while leaving the interior undercooked. I discovered that medium‑high heat gives a perfect caramelized crust without scorching. Keep the skillet preheated for a minute before adding oil, and then reduce to medium once the chicken hits the pan. This balance ensures the chicken cooks evenly and the glaze sets beautifully. The result is a tender, juicy interior with a crisp, flavorful exterior.
Why Your Nose Knows Best
The aroma of garlic sizzling in olive oil is a reliable indicator that the pan has reached the right temperature. If the scent lingers too long, the garlic may burn, imparting bitterness. Conversely, if the aroma is faint, the heat is too low and the chicken will steam rather than sear. Trust your nose to guide you; a strong, fragrant scent means you’re in the sweet spot. This sensory cue saves you from over‑ or under‑cooking the chicken.
The 5‑Minute Rest That Changes Everything
After cooking, let the chicken rest for five minutes before slicing. This brief pause allows the juices to redistribute, ensuring each bite remains moist. Cutting too early can cause the juices to spill out, resulting in dry meat. The rest period also gives the glaze time to set, creating a glossy finish that clings to every surface. I’ve seen this trick turn a good dish into an unforgettable one.
Keep the Sauce Smooth
When thickening the sauce, stir constantly to prevent clumping. If you notice lumps, whisk vigorously or use a small whisk to break them up. The goal is a silky, glossy glaze that coats the chicken evenly. A smooth sauce indicates that the cornstarch has fully incorporated, giving the dish a professional finish. A lumpy glaze, on the other hand, detracts from the overall experience.
Use Fresh Garlic for Depth
Fresh garlic provides a bright, punchy flavor that canned or pre‑minced garlic can’t match. Mince the garlic just before cooking to preserve its aromatic oils. The result is a more vibrant, complex sauce that elevates the dish. If you’re in a hurry, a garlic press works well, but the flavor will be slightly muted.
These tricks are the secret sauce behind a flawless honey garlic chicken. Apply them consistently, and you’ll master the dish in no time. Even seasoned chefs can benefit from these nuances, as they fine‑tune the balance of flavors and textures. Keep practicing, and you’ll see your confidence grow with each batch. Enjoy the journey, and let your kitchen be the stage for this culinary masterpiece.
Creative Twists and Variations
This recipe is a playground. Here are some of my favorite ways to switch things up:
Spicy Sriracha Honey
Add a tablespoon of sriracha to the glaze for a fiery kick. The heat balances the sweetness and adds a smoky undertone. Serve over rice to absorb the extra spice. This variation is perfect for those who love a little heat in their dishes.
Thai Coconut Twist
Replace the water in the cornstarch slurry with coconut milk for a creamy, tropical flavor. The coconut milk also adds a subtle nutty note that pairs well with the honey. Garnish with toasted coconut flakes for extra crunch. This version transports you straight to a beachside restaurant.
Herb‑Infused Variation
Swap oregano for fresh thyme or rosemary for a more aromatic profile. The herbs complement the honey and soy sauce, adding depth. Use chopped fresh herbs after cooking to preserve their bright flavors. This twist is ideal for a rustic, farmhouse vibe.
Smoked Paprika Finish
Stir in a teaspoon of smoked paprika during the final glaze stage for a smoky, earthy flavor. The paprika adds color and a subtle depth that elevates the dish. Pair with roasted vegetables for a balanced meal. This variation works well for a cozy dinner party.
Asian Noodle Bowl
Serve the glazed chicken over a bed of rice noodles, topped with sliced cucumber and shredded carrots. Drizzle extra sauce over the noodles for a quick, flavorful meal. Add a sprinkle of sesame seeds for crunch. This bowl is both satisfying and refreshing.
Low‑Carb Keto Version
Replace the honey with a sugar‑free sweetener like erythritol or monk fruit. Use a sugar‑free soy sauce or tamari to keep the dish keto‑friendly. Add a side of sautéed spinach or cauliflower rice. This variation keeps the flavor profile while reducing carbs.
Feel free to experiment and let your creativity run wild. Each variation offers a new flavor adventure while keeping the core of this beloved dish intact. You’ll discover that a few simple tweaks can turn a familiar recipe into something entirely new and exciting.
Storing and Bringing It Back to Life
Fridge Storage
Cool the chicken completely before placing it in an airtight container. Store in the refrigerator for up to 48 hours. The glaze may thicken slightly, but the flavor remains robust. Keep the container sealed to prevent moisture loss, ensuring the chicken stays juicy.
Freezer Friendly
Wrap each chicken breast individually in parchment paper and place them in a freezer bag. Freeze for up to 3 months. When ready to use, thaw overnight in the refrigerator. This method preserves the texture and prevents freezer burn.
Best Reheating Method
Reheat gently in a skillet over medium heat, adding a splash of water or broth to loosen the glaze. This steaming technique restores moisture and keeps the sauce glossy. Alternatively, microwave on low power for 30‑second intervals, stirring between, until heated through. Avoid overheating, which can dry out the chicken.
Adding a tiny splash of water before reheating steams the chicken back to perfection, preventing it from drying out. The small amount of liquid also helps the glaze re‑emulsify, giving that glossy finish you love. These tips ensure your leftovers taste as fresh as the first batch.