Ever had a holiday baking session that ended in a flour‑smudged kitchen and a half‑empty pantry? I was there, whisking eggnog into a batter that looked more like a soggy dough than a scone, when my friend dared me to “make something that actually rises.” The moment I cracked the final egg, the kitchen filled with that sharp, buttery scent that only freshly baked goods can bring, and the anticipation of the first bite felt like a secret handshake between the oven and my taste buds. I laughed, because I knew this was going to be a culinary experiment, but deep down I was ready for a flavor revelation.
Picture the scene: a countertop dusted with flour, a bowl of steaming eggnog, and a dash of nutmeg that crackles when it hits the pan. The air is thick with the sweet, spicy aroma of cinnamon and the faint whisper of vanilla; you can almost taste the buttery crust before it even leaves the oven. My eyes catch the golden edges forming, the scones puffing like a cloud that’s ready to burst, and I know I’m on the brink of something extraordinary. I’ve always loved eggnog, but I’ve never seen it transformed into a scone that feels like a holiday hug in every bite.
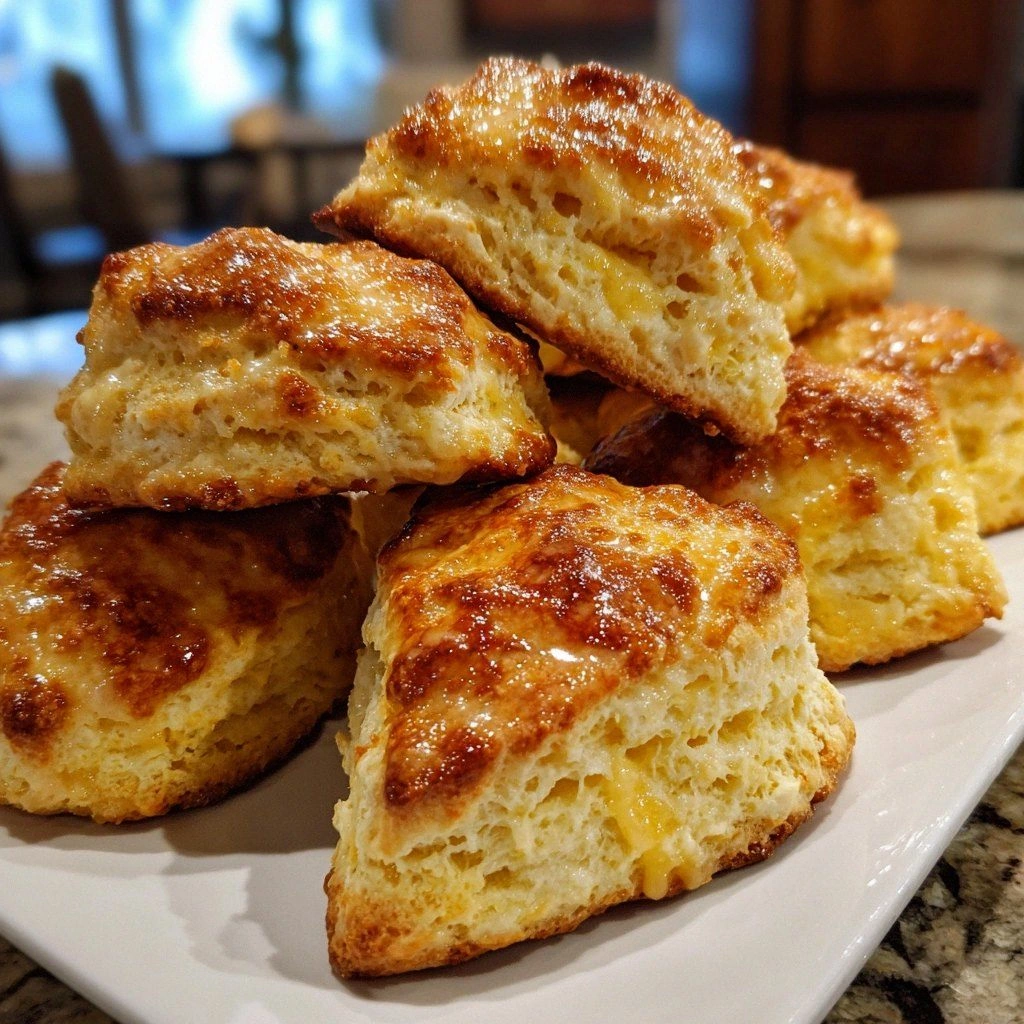
This recipe isn’t just another take on a seasonal treat; it’s a reimagining of fluffy, airy scones that marry the creamy richness of eggnog with the comforting warmth of spices. The secret? A precise balance of leavening, a touch of cold butter for that flaky layer, and a daring splash of eggnog that replaces traditional milk, giving the dough a silky, custard‑like texture that melts on the tongue. The result is a scone that rises like a cloud, cracks open to reveal a custard‑filled center, and coats your palate with a velvety, nutty finish. I dare you to taste this and not go back for seconds.
If you’ve ever struggled with dense, heavy scones that feel like a brick, you’re not alone—this is the fix. Picture yourself pulling a batch from the oven, the whole kitchen smelling incredible, and each scone looking like a golden sunrise. The moment you bite, the airy interior gives way to a burst of eggnog flavor that feels like a holiday in a bite. That sizzle when it hits the pan? Absolute perfection. Let me walk you through every single step — by the end, you’ll wonder how you ever made it any other way.
What Makes This Version Stand Out
- Texture: The dough is light and airy, thanks to the combination of baking powder and cold butter that creates steam pockets. When baked, the scones rise dramatically, producing a fluffy interior that feels like a cloud. The result is a crisp exterior that cracks with a satisfying snap.
- Flavor: Eggnog replaces milk, infusing the dough with a subtle sweetness and a hint of nutmeg that lingers on the palate. The spices are balanced, not overpowering, so the eggnog’s creamy richness shines through. A dash of vanilla ties everything together like a warm hug.
- Ease: No complicated techniques—just whisk, fold, and bake. The recipe uses pantry staples and a single heat source, making it approachable for novices and seasoned bakers alike. The dough can be assembled in minutes, so you’ll spend more time enjoying and less time prepping.
- Versatility: The base can be tweaked with nuts, dried fruit, or a swirl of caramel for endless variations. The recipe scales beautifully, making it ideal for a small family or a holiday gathering. You can even freeze the dough for a quick breakfast on busy mornings.
- Presentation: The golden tops, lightly dusted with powdered sugar, look like a winter wonderland. When you slice one open, the interior reveals a glossy, custard‑like center that’s as photogenic as it is delicious. Your guests will be impressed, and you’ll feel like a culinary wizard.
- Make‑Ahead Potential: The dough holds up well in the fridge for up to 48 hours, and the baked scones keep fresh for a week when stored properly. You can bake ahead of time and reheat to restore that buttery crunch. This makes it a perfect prep‑work recipe for holiday parties.
Alright, let's break down exactly what goes into this masterpiece…
Inside the Ingredient List
The Flavor Base
All‑purpose flour is the backbone of this scone, providing structure while remaining light enough for fluffiness. Using a slightly heavier flour, like bread flour, will produce a denser crumb that’s not ideal for this recipe. If you’re on a gluten‑free diet, try a 1:1 blend of gluten‑free flour and xanthan gum to mimic the elasticity of wheat flour.
The Texture Crew
Cold butter is the secret to flaky layers; it melts during baking, creating steam pockets that lift the dough. Powdered sugar adds a touch of sweetness and a silky mouthfeel that balances the eggnog’s richness. Ground cinnamon and nutmeg bring warmth and depth, but be careful not to overdo the spices or they’ll mask the eggnog’s flavor.
The Unexpected Star
Eggnog isn’t just a liquid—it’s a flavor powerhouse. Its natural sweetness and creamy texture replace milk, giving the scones a custard‑like center that melts in your mouth. The alcohol content evaporates during baking, leaving behind the comforting vanilla and nutmeg notes that make this recipe holiday‑season ready.
The Final Flourish
A pinch of salt is essential to cut through the sweetness and highlight the spices. The optional pecans add a satisfying crunch and nutty undertone, but you can swap them for walnuts, dried cranberries, or even chocolate chips for a different twist. Vanilla extract ties all the flavors together, giving the dough a subtle aroma that’s reminiscent of freshly baked cookies.
Everything's prepped? Good. Let's get into the real action…
The Method — Step by Step
- Preheat the oven to 400°F (200°C). Line a baking sheet with parchment paper to prevent sticking and to give the scones a crisp base. This step ensures even heat distribution for a golden finish.
- In a large bowl, whisk together the flour, baking powder, salt, cinnamon, and nutmeg. The dry mixture must be evenly blended so that each bite has a consistent flavor profile. A small sift can help remove lumps and aerate the flour.
- Add the cold butter cubes to the dry mixture. Using a pastry cutter or your fingertips, cut the butter into the flour until the mixture resembles coarse crumbs. This technique locks in the butter and creates flaky layers.
- In a separate bowl, whisk the egg, eggnog, and vanilla extract until fully combined. The liquid should be smooth, with no lumps of raw egg. This mixture will act as the binding agent for the dough.
- Pour the wet mixture into the dry ingredients. Stir gently with a wooden spoon or a silicone spatula until just combined; the dough should be slightly sticky but hold together. Over‑mixing can develop gluten, leading to dense scones.
- Fold in the chopped pecans. If you’re using a different nut or dried fruit, add it at this stage. The nuts should be evenly distributed to avoid pockets of crunch.
- Turn the dough onto a floured surface and gently pat it into a 1‑inch thick rectangle. Avoid pressing it too hard; you want to preserve the air pockets for fluffiness. Use a pastry cutter to cut the rectangle into 8 wedges.
- Place the wedges onto the prepared baking sheet, leaving a small gap between each. Sprinkle the tops lightly with powdered sugar for a sweet finish. The sugar will caramelize slightly, adding a subtle crunch.
- Bake for 18–22 minutes, or until the scones are golden brown and a toothpick inserted into the center comes out clean. The scones should smell like a warm holiday kitchen and feel slightly springy to the touch.
And now the fun part. The scones are ready to be devoured, but before you do, let me share a few final tricks that will elevate this recipe to another level.
Insider Tricks for Flawless Results
The Temperature Rule Nobody Follows
Many bakers bake at 375°F, but 400°F is the sweet spot for achieving that perfect rise. The higher temperature creates a quick crust that locks in moisture while the interior stays airy. If you’re using a convection oven, lower the temperature by 20°F to avoid over‑browning.
Why Your Nose Knows Best
Smell the scones as they bake; a warm, buttery aroma indicates the butter is melting just right. If you detect a faint alcohol scent, the eggnog is still in the dough and hasn’t fully cooked. The scent will shift to a caramelized sugar note when the scones are ready.
The 5-Minute Rest That Changes Everything
Let the scones cool on the sheet for 5 minutes before transferring to a wire rack. This short rest allows steam to escape, preventing soggy bottoms. The scones will firm up slightly, making slicing easier.
The Perfect Dusting Technique
Instead of a simple dusting, sift powdered sugar through a fine sieve to avoid clumps. A light dusting adds sweetness without overpowering the eggnog’s subtle flavor. For a festive touch, add a pinch of ground ginger or cayenne for a subtle kick.
The Secret to Fluffy Scones
Keep your hands as cool as possible; warm hands can melt the butter, causing the dough to become tough. Work quickly and efficiently to preserve the cold butter’s integrity. If the dough feels too sticky, add a tablespoon of flour to achieve the right consistency.
Creative Twists and Variations
This recipe is a playground. Here are some of my favorite ways to switch things up:
Chocolate Eggnog Scones
Add 1/4 cup of melted dark chocolate to the wet mixture for a decadent, bittersweet flavor. The chocolate pairs beautifully with the nutmeg, creating a rich, holiday treat. Serve with a dusting of cocoa for an extra chocolatey finish.
Cranberry Orange Scones
Replace the pecans with 1/2 cup of dried cranberries and add 1 tablespoon of orange zest. The tartness of the cranberries balances the eggnog’s sweetness, while the orange adds a bright, citrusy note that’s refreshing.
Almond Joy Scones
Swap pecans for toasted almond slices and fold in 1/4 cup of shredded coconut. The coconut adds a tropical twist that complements the nutmeg, while the almonds provide a satisfying crunch. Drizzle melted chocolate over the tops before baking for a sweet finish.
Pumpkin Spice Scones
Add 1/2 cup of pumpkin puree to the wet mixture and increase the cinnamon to 1 teaspoon. The pumpkin’s natural sweetness and earthy flavor pair wonderfully with the eggnog, creating a cozy, autumnal treat. Sprinkle a pinch of ground cloves for an extra depth of flavor.
Savory Herb Scones
Omit the powdered sugar and add 1 tablespoon of chopped fresh rosemary. This savory version is perfect for brunch, served with a dollop of cream cheese and chives. The herbs add a fragrant, aromatic quality that complements the eggnog’s richness.
Storing and Bringing It Back to Life
Fridge Storage
Store the baked scones in an airtight container at room temperature for up to 3 days. If you prefer them warm, reheat in a 300°F oven for 5 minutes. The scones will retain their flaky crust and airy interior when stored properly.
Freezer Friendly
Wrap each scone individually in parchment paper and place them in a freezer bag. They stay fresh for up to 2 months. To thaw, leave at room temperature for 1 hour, then warm in a 350°F oven for 5–7 minutes. The dough will re‑breathe, restoring its buttery crunch.
Best Reheating Method
Add a tiny splash of water to the bottom of the baking sheet before reheating. The steam created will keep the scones moist and prevent them from drying out. Reheat at 350°F for 5–7 minutes, or until warmed through.