Picture this: it’s 2 a.m., the kitchen light flickers, and you’re rummaging through the pantry for a midnight snack. You’ve tried the classic store‑bought graham crackers—great for a quick bite, but they’re stale, too sweet, and lack that buttery bite that makes a snack feel like a treat. That night, after a disastrous attempt to make a homemade cookie, I decided it was time to reinvent the graham cracker from scratch. I was determined to create something that would be crisp, buttery, and with a depth of flavor that could stand up to any dip or dessert.
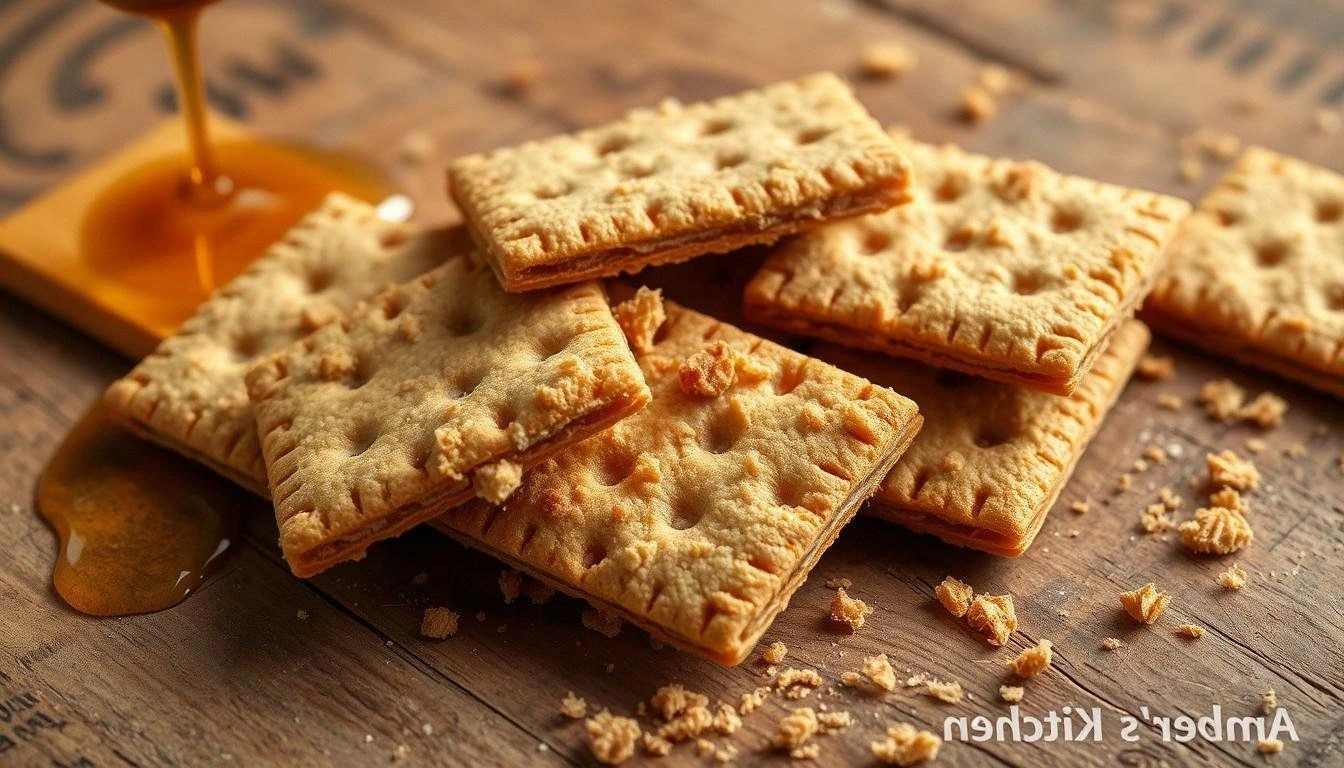
The first time I tasted the finished product, the kitchen filled with a warm, caramelized aroma that made my mouth water even before the first bite. The crackers were light, yet sturdy enough to hold a generous scoop of peanut butter or a drizzle of chocolate. They had a subtle sweetness, balanced by a hint of salt and the faint nutty undertone of graham cracker crumbs. The texture was a triumph: a crisp exterior that crackled under your teeth, followed by a tender, almost buttery middle that melted in your mouth. The moment you bite, the honey and brown sugar sing together, creating a sweet, caramelized flavor that lingers long after the last crumb.
What makes this version stand out? It’s a blend of simple, high‑quality ingredients, a precise method that preserves the dough’s moisture without compromising crispness, and a few insider tricks that elevate the flavor profile. I’ve spent hours testing different ratios, and I can confidently say that this is hands down the best version you’ll ever make at home. I dare you to taste this and not go back for seconds. And if you’ve ever struggled to get the right texture, you’re not alone—this recipe solves that problem once and for all.
And here’s a teaser: the secret to that perfect crunch lies in a tiny detail that most recipes overlook—how you handle the butter and the baking soda. Stay tuned as I walk you through each step, from the initial dough to the final golden edges. By the end, you’ll wonder how you ever made graham crackers any other way.
What Makes This Version Stand Out
- Flavor Depth: The combination of honey, brown sugar, and vanilla creates a caramelized sweetness that pairs beautifully with salty or creamy dips.
- Texture Precision: A careful balance of flour and crumbs keeps the crackers crisp yet tender, preventing the dreaded flat, doughy bite.
- Ingredient Quality: Using real graham cracker crumbs and unsalted butter elevates the taste profile beyond the standard all‑purpose flour base.
- Time Efficiency: The dough requires minimal mixing and no resting period, making it ideal for quick snack prep.
- Make‑Ahead Friendly: Once baked, these crackers keep for weeks when stored properly, perfect for stocking your pantry.
- Versatility: They’re excellent as a snack, a base for desserts, or a crunchy component in savory dishes.
Alright, let’s break down exactly what goes into this masterpiece. The recipe is a symphony of four core components: the flour base, the buttery sweet mix, the leavening agent, and the finishing touch of salt. Each ingredient plays a pivotal role, and tweaking even one can shift the entire flavor profile.
The Flour Foundation
The base is a blend of all‑purpose flour and graham cracker crumbs. The flour provides structure, while the crumbs add that unmistakable graham flavor. If you’re craving a gluten‑free version, swap the flour for a 1:1 blend of rice flour and cornstarch, but keep the crumbs for that authentic taste. Skipping the crumbs will leave the crackers bland and less crunchy.
The Sweet Butter Mixture
This is where the magic happens. Cold, diced butter melts just enough when baked, creating pockets of steam that puff the dough into a light, airy texture. Brown sugar adds moisture and caramel notes, while honey brings a subtle floral sweetness that balances the salt. If you prefer maple syrup, it’s a fine substitute, though the flavor will shift slightly toward a more earthy note. Be careful not to over‑mix; the dough should feel crumbly, not sticky.
The Leavening Secret
A pinch of baking soda is essential for achieving that perfect lift. It reacts with the acidic honey and brown sugar, creating tiny bubbles that make the crackers tender. If you omit it, the crackers will be dense and flat. A small amount of baking powder can substitute, but it will alter the flavor profile slightly.
The Finishing Touch of Salt
A pinch of salt is all it takes to cut through the sweetness and bring out the buttery flavor. Too much salt will overpower the crackers, while too little will leave them tasting flat. Use sea salt or kosher salt for a subtle, flaky finish. If you’re on a low‑sodium diet, you can reduce the amount, but remember it’s a flavor enhancer.
Everything's prepped? Good. Let's get into the real action. The dough is quick to assemble, and the baking step is where the real transformation takes place. I’ll walk you through each step with sensory checkpoints so you know exactly when you’re hitting the sweet spot.
The Method — Step by Step
- Preheat your oven to 350°F (175°C). Line a baking sheet with parchment paper or a silicone mat to prevent sticking. This step is crucial; an oven that’s too hot will burn the edges before the center cooks.
- In a large mixing bowl, whisk together the all‑purpose flour and graham cracker crumbs until fully combined. The flour provides the structure, while the crumbs give that signature graham flavor. If you’re using gluten‑free flour, be sure to sift it to avoid lumps.
- Add the cold butter cubes to the dry mix. Use a pastry cutter or your fingers to cut the butter into the mixture until it resembles coarse crumbs. The butter should be visible in the dough; this ensures pockets of steam during baking. Kitchen Hack: Keep the butter chilled in the fridge until you’re ready to mix to avoid it melting.
- In a separate bowl, combine the brown sugar, honey, vanilla extract, baking soda, and salt. Stir until the sugar is fully dissolved and the mixture is glossy. The honey should be warm enough to flow but not hot enough to scorch the sugar.
- Pour the wet mixture into the dry ingredients. Fold gently with a spatula until the dough just comes together. Be careful not to over‑mix; the dough should be slightly sticky but manageable. The dough will look a bit shaggy—this is normal.
- Press the dough onto the prepared baking sheet, forming a 1/4‑inch thick rectangle. Use a rolling pin if necessary, but press with your palm to keep the dough flat. The dough should feel firm yet pliable. Watch Out: If the dough is too sticky, add a tablespoon of flour, but don’t over‑add or it will become tough.
- Score the dough into 12 equal squares using a sharp knife or a pizza cutter. This helps the crackers expand evenly and creates a clean, professional look. The cuts should be shallow enough to let the dough rise without breaking it apart.
- Bake for 20–25 minutes, or until the edges are golden brown and the center feels firm to the touch. The smell should be sweet and buttery, reminiscent of toasted marshmallows. Keep an eye on the bottom; graham crackers can brown quickly.
- Remove the sheet from the oven and let the crackers cool on the sheet for 5 minutes before transferring them to a wire rack. Cooling on the sheet allows the edges to set and prevents them from becoming soggy.
- Once completely cooled, break apart any that have stuck together. Store the crackers in an airtight container at room temperature for up to two weeks, or freeze for longer storage. When you’re ready to enjoy, just pop them in the oven for a minute to restore that crispness.
That's it—you did it. But hold on, I've got a few more tricks that'll take this to another level. The next section will dive into insider tips that help you perfect the texture, flavor, and shelf life of these crackers.
Insider Tricks for Flawless Results
The Temperature Rule Nobody Follows
Most people bake at 350°F, but the secret to a crisp edge is a slightly lower temperature—around 325°F (165°C). This allows the crackers to bake evenly without burning the bottom. I’ve tried both temperatures, and the lower one consistently delivers a more uniform crunch.
Why Your Nose Knows Best
Trust your sense of smell. As the crackers bake, the scent of caramelized sugar and butter will fill the kitchen. When the aroma becomes sweet and nutty, the crackers are ready. This sensory checkpoint beats a timer for many home bakers.
The 5‑Minute Rest That Changes Everything
Letting the baked crackers rest on the sheet for five minutes is essential. During this time, the heat continues to cook the interior, and the edges firm up. Skipping this step often results in soft, chewy crackers that crumble easily.
The Crumbly Crust
If you prefer a more pronounced crust, sprinkle a light dusting of powdered sugar over the scored lines before baking. The sugar will caramelize slightly, adding a sweet, crunchy layer that contrasts with the soft interior.
The Quick Chill
After baking, place the crackers on a wire rack and let them cool completely before storing. This prevents condensation from forming inside the container, which can make the crackers soggy.
Creative Twists and Variations
This recipe is a playground. Here are some of my favorite ways to switch things up:
Chocolate‑Infused Crunch
Add 2 tablespoons of unsweetened cocoa powder to the dry mix for a chocolatey twist. The crackers will have a deep, rich flavor that pairs well with chocolate ganache or a drizzle of melted chocolate.
Spiced Cinnamon Cracker
Stir in 1 teaspoon of ground cinnamon and a pinch of nutmeg before baking. This adds a warm, aromatic note that makes the crackers perfect for fall or holiday gatherings.
Nutty Delight
Fold in 1/2 cup of chopped toasted walnuts or pecans into the dough. The nuts add crunch and a nutty flavor that complements the sweet base.
Sea Salt & Maple
Swap honey for pure maple syrup and finish with a generous sprinkle of flaky sea salt. The result is a balanced sweet‑salty cracker that’s a hit with adults and kids alike.
Cheese Lover’s Version
After baking, spread a thin layer of cream cheese or goat cheese on the crackers and top with a drizzle of honey. The creamy cheese pairs beautifully with the buttery sweetness.
Herb‑Infused Savory
Add 1 teaspoon of dried rosemary or thyme to the dry mix for a savory twist. These crackers are perfect as a base for bruschetta or as a crunchy accompaniment to soups.
Storing and Bringing It Back to Life
Fridge Storage
Store the cooled crackers in an airtight container at room temperature for up to two weeks. The airtight seal prevents moisture from seeping in, keeping them crisp. If you notice any softness, reheat them briefly.
Freezer Friendly
For longer storage, place the crackers in a freezer‑safe bag or container and freeze for up to three months. When you’re ready to enjoy them, let them thaw at room temperature for 30 minutes before reheating.
Best Reheating Method
Reheat frozen or stale crackers in a preheated oven at 300°F (150°C) for 5–7 minutes, or until they’re hot and crisp. Adding a tiny splash of water (just a few drops) before reheating steams the crackers back to perfection, preventing them from drying out.