Picture this: it’s a Friday night, the lights are dim, and you’re standing in front of a stubborn, burnt skillet that refuses to cooperate. You’re craving a comforting, indulgent dish that feels like a hug from the inside out. Suddenly, your mind flashes back to that one time you tried making a classic cheeseburger pie for a potluck, only to end up with a soggy, flavorless mess that left everyone asking for the recipe. I swear I still hear the faint hiss of that disaster in my kitchen, a reminder that even the most beloved comfort foods can go awry if you’re not careful. That night, I made a promise to myself: I would craft a version of the cheeseburger pie that would make every bite sing and every eye water with delight. And boy, did I deliver.
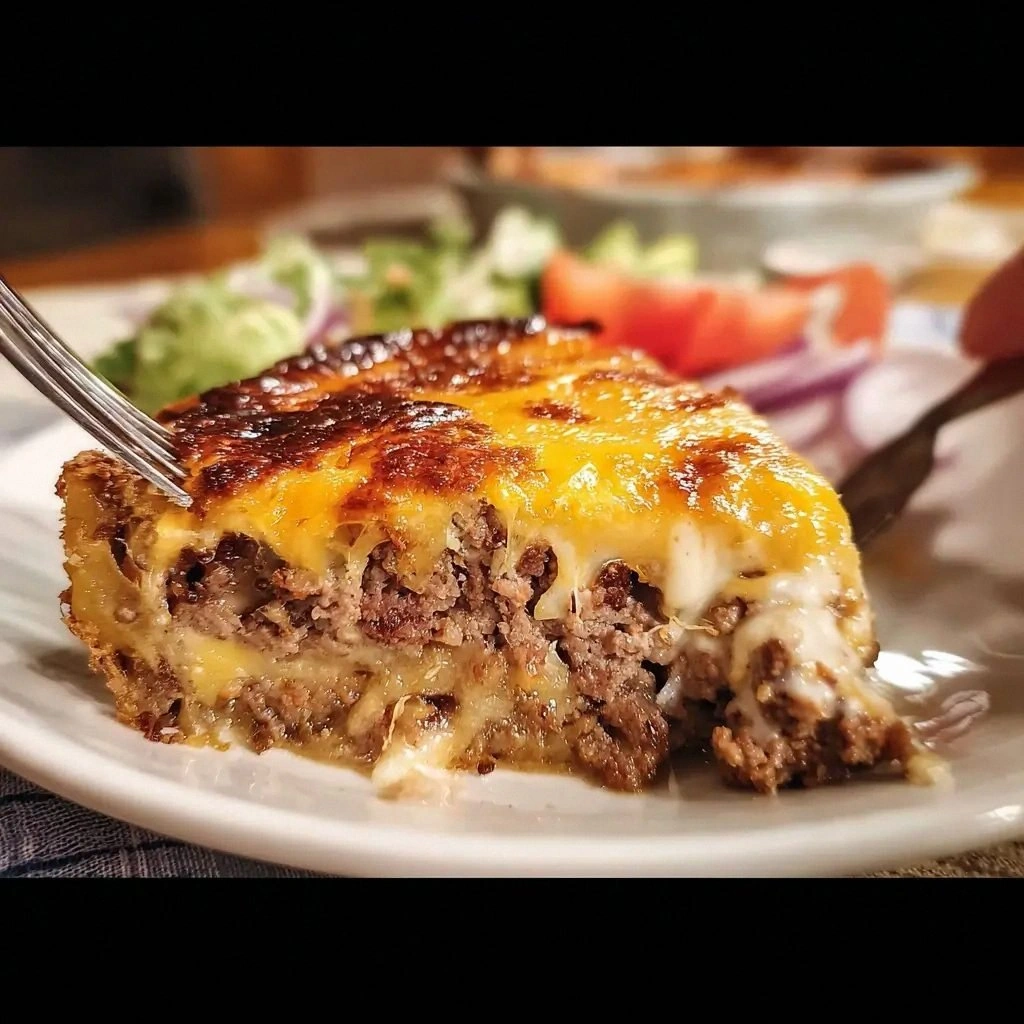
The first thing you notice about this rendition is the aroma—rich, meaty, and tinged with the sweet caramelization of onions. The scent lingers in the air, mingling with a faint whisper of cheddar melting into the sauce, creating an olfactory prelude that tells you something extraordinary is about to happen. The visual appeal is a golden crust that crackles slightly when you slice into it, revealing a glossy, tomato‑sauce‑laden center that glistens like a ruby. The texture is a harmonious blend: a flaky, buttery exterior that gives way to a juicy, seasoned beef filling, topped with a gooey layer of melted cheese that stretches like a savory silk. If you’re lucky enough to catch the first bite, the sound of that satisfying snap is almost music.
Why does this recipe stand out? It’s a simple, yet meticulous balance of flavors and textures that turns a humble pie into a showstopper. The secret lies in a few intentional tweaks: a splash of Worcestershire sauce that deepens the umami, a dash of smoked paprika that adds a subtle kick, and a layer of shredded mozzarella that creates that irresistible gooeyness. I’ve spent countless evenings refining this dish, and I can confidently say that this is hands down the best version you’ll ever make at home. I dare you to taste this and not go back for seconds. If you’re skeptical, just keep reading—you’ll see why.
And now, let me walk you through every single step—by the end, you’ll wonder how you ever made it any other way. This isn’t just another pie; it’s a culinary experience that will elevate your dinner routine, impress your friends, and, honestly, make your kitchen smell like a five‑star restaurant. So grab your apron, fire up that oven, and let’s get cooking.
What Makes This Version Stand Out
- Flavor Depth: The combination of tomato sauce, Worcestershire, and smoked paprika creates a layered umami profile that feels both comforting and adventurous.
- Texture Contrast: The flaky crust, tender beef, and melty cheese provide a delightful play of crispness, juiciness, and gooeyness.
- Ingredient Quality: Using fresh, high‑grade ground beef and real cheddar ensures each bite is packed with authentic flavor.
- Time Efficiency: Prep takes just 15 minutes, while the cooking time is a quick 30, making it perfect for busy weeknights.
- Make‑Ahead Friendly: Assemble the pie a day early and bake when you’re ready—no loss of flavor or texture.
- Crowd‑Pleaser: Its familiar taste with a gourmet twist guarantees rave reviews at gatherings.
- Versatility: Swap the beef for turkey, chicken, or a plant‑based alternative without compromising the core experience.
- Minimal Cleanup: One skillet and a pie dish, and you’re done—no extra pots or pans to wash.
Inside the Ingredient List
The Flavor Base
At the heart of this pie is the beef mixture, which carries the bulk of the savory punch. The 1 pound of ground beef should be a good 80/20 blend to keep it juicy yet not greasy. As it browns, the fat renders out, leaving behind a golden crust that locks in juices. The 1 cup of tomato sauce acts as the sauce’s backbone, providing acidity that balances the richness of the meat and cheese. A splash of Worcestershire sauce adds that subtle depth of umami that elevates the dish from ordinary to memorable. If you’re a fan of smoky flavors, a half teaspoon of smoked paprika will bring a gentle, aromatic heat that lingers on the palate.
The Texture Crew
Texture is everything in a pie. The 1/2 cup of shredded cheddar cheese melts into the sauce, creating a velvety, gooey layer that coats the beef. Layer that with 1/2 cup of shredded mozzarella for an extra stretchiness that’s impossible to resist. The diced onion, sautéed until translucent, adds a subtle crunch and a sweet bite that cuts through the richness. Minced garlic—just two cloves—injects a punch of aroma that rises with every bite. Finally, the pie crust, either homemade or store‑bought, provides a buttery, flaky base that holds everything together.
The Unexpected Star
It’s easy to overlook the role of the egg wash, but that single beaten egg mixed with a tablespoon of milk gives the crust a glossy, golden finish. It also creates a slightly crisp edge that contrasts beautifully with the soft interior. The 1 tablespoon of olive oil, used to sauté the onions and garlic, ensures a smooth sautéing process and adds a subtle fruity note. A pinch of salt and a half teaspoon of freshly ground black pepper bring the flavors together, while fresh parsley, sprinkled on top after baking, adds a burst of color and a hint of freshness.
The Final Flourish
The final flourish is the simple yet effective use of a 9‑inch pie crust. A pre‑baked crust reduces the risk of sogginess, allowing the filling to stay moist without compromising the structure. If you’re adventurous, try a homemade crust made from a mix of all‑purpose flour, butter, and a dash of cold water for that extra flaky texture. For a low‑carb version, swap the crust for a cauliflower or almond flour base, and the pie will still hold up beautifully. Remember, the crust is the canvas; everything else is the paint.
Everything's prepped? Good. Let's get into the real action...
The Method — Step by Step
- Preheat your oven to 375°F (190°C). While the oven warms, bring a large skillet to medium heat. Once hot, add the 1 tablespoon of olive oil, allowing it to shimmer before adding the diced onions. Sauté until they’re translucent and slightly caramelized, about 4–5 minutes. This step is critical; the onions’ sweetness will anchor the savory profile of the pie.
- Add the minced garlic to the skillet, stirring constantly to prevent burning. Cook for 30 seconds until fragrant, then pour in the ground beef. Break it up with a wooden spoon and let it brown evenly. The goal is a deep, caramelized crust on the meat—this adds a robust flavor that the rest of the filling can’t compete with.
- Once the beef is fully browned, drain any excess grease if desired. Stir in the tomato sauce, Worcestershire sauce, smoked paprika, salt, and pepper. Simmer the mixture for 5 minutes, allowing the flavors to meld. The sauce should thicken slightly; if it remains too watery, let it reduce a bit longer.
- Fold in the shredded cheddar and mozzarella cheeses until they’re fully melted and coated the meat. The cheeses should be glossy and stretchy, creating a luscious base for the pie. Let the mixture cool for a minute to prevent the crust from cracking when you place it in the pie dish.
- Place the pre‑baked pie crust into a 9‑inch pie dish, pressing gently to fit the edges. Spoon the beef and cheese mixture into the crust, spreading it evenly. The filling should sit just below the crust’s rim to prevent overflow.
- Whisk the egg with a tablespoon of milk to create an egg wash. Brush the crust’s edges and top with this mixture, ensuring a smooth, even coating. The egg wash will give the crust a beautiful golden hue and a slightly crisp finish.
- Place the pie in the preheated oven and bake for 25–30 minutes. The crust should be a deep golden brown, and the cheese should be bubbling. Watch the top; if it starts to brown too quickly, tent it with aluminum foil to prevent burning.
- When the pie is done, remove it from the oven and let it rest for 10 minutes. This resting period allows the juices to settle, ensuring each slice stays moist and the flavors fully integrate. While it rests, sprinkle fresh parsley over the top for a pop of color and a hint of herbal freshness.
- Slice the pie with a sharp knife, wiping the blade clean between cuts to maintain clean edges. Serve immediately, accompanied by a side of crisp salad or steamed veggies for a balanced meal. The aroma that fills your kitchen as you cut through the crust is the ultimate reward for your effort.
That's it — you did it. But hold on, I've got a few more tricks that'll take this to another level...
Insider Tricks for Flawless Results
The Temperature Rule Nobody Follows
Many people bake at 400°F, thinking higher heat equals crispier crust. In reality, 375°F is the sweet spot that allows the crust to brown without burning while giving the filling enough time to meld. A lower temperature also prevents the cheese from separating, ensuring a smooth, even melt. If you’re using a convection oven, reduce the temperature by 25°F to avoid over‑browning.
Why Your Nose Knows Best
Your sense of smell is your best judge of doneness. When the pie is ready, the aroma should be rich, slightly caramelized, and the cheese should emit a comforting, buttery scent. If the smell is too meaty or raw, give it a few more minutes. Trusting your nose is a skill honed over years of cooking, and it’s often more reliable than a timer.
The 5‑Minute Rest That Changes Everything
Letting the pie rest for exactly 5 minutes after baking is a game‑changer. It allows the filling to set, preventing a runny center that would otherwise spill onto the crust. The rest also lets the cheese set into a silky consistency, making each slice easier to handle. If you’re serving the pie hot, this short pause ensures every bite is as delicious as the first.
Layering for Extra Juiciness
Add a thin layer of sliced onions or bell peppers between the crust and the beef filling. This extra barrier keeps the crust from becoming soggy and adds a subtle crunch. The vegetables also absorb some of the excess moisture, resulting in a more cohesive pie. A quick sauté before layering ensures they’re tender and flavorful.
Egg Wash Secrets
The key to a shiny crust isn’t just the egg; it’s the addition of a splash of milk. The milk softens the egg’s protein, preventing a rubbery finish. Brush the egg wash just before baking to avoid premature browning. If you want an extra golden top, finish the last 2 minutes of baking with a light sprinkle of grated Parmesan.
Make‑Ahead Magic
You can assemble the pie up to 24 hours in advance. Cover it tightly with plastic wrap and refrigerate. When ready to bake, let it sit at room temperature for 15 minutes before baking to ensure even cooking. This prep time is a lifesaver for busy weekdays and guarantees you never have to rush a dinner.
Creative Twists and Variations
This recipe is a playground. Here are some of my favorite ways to switch things up:
Turkey Cheeseburger Pie
Swap the ground beef for ground turkey for a leaner version. The turkey’s milder flavor pairs beautifully with the cheddar and mozzarella. Add a pinch of sage to give it a subtle earthy undertone that complements the meat.
BBQ Bacon Cheeseburger Pie
Incorporate chopped bacon and a tablespoon of BBQ sauce into the beef mixture. The smoky sweetness of the sauce and the crisp bacon create a flavor profile reminiscent of a backyard cookout.
Vegan Cheeseburger Pie
Use crumbled tempeh or textured vegetable protein (TVP) instead of beef. Replace dairy cheeses with a plant‑based cheddar blend and use a vegan pie crust. The result is a hearty, protein‑rich pie that satisfies even the most skeptical carnivores.
Spicy Jalapeño Cheeseburger Pie
Dice a jalapeño and sauté it with the onions for an extra kick. Add a teaspoon of cayenne pepper to the sauce. The heat balances the richness of the cheese and creates a bold, memorable bite.
Cheese‑Heavy Macaroni Cheeseburger Pie
Fold cooked macaroni into the beef mixture before adding the cheese. The pasta adds body and a comforting, nostalgic element. Top with a sprinkle of breadcrumbs for an extra crunch.
Herb‑Infused Cheeseburger Pie
Add fresh thyme and rosemary to the beef while it browns. The herbs lend a fragrant, aromatic layer that elevates the dish from simple to sophisticated.
Storing and Bringing It Back to Life
Fridge Storage
Cool the pie to room temperature, then cover it tightly with plastic wrap and store in the refrigerator for up to 3 days. The crust may soften slightly, but the filling remains moist and flavorful. Before serving, reheat in a preheated oven at 350°F for 10 minutes.
Freezer Friendly
Wrap the cooled pie in aluminum foil, then place in a freezer bag. It stays good for up to 2 months. To reheat, thaw overnight in the refrigerator, then bake at 350°F for 15–20 minutes, or until heated through.
Best Reheating Method
The oven is the king of reheating. If you’re short on time, microwave the pie on high for 2 minutes, then transfer to the oven for a final 5 minutes to crisp the crust. Add a splash of water to the bottom of the pan to create steam, preserving moisture and preventing the crust from drying out.