I was halfway through a disastrous batch of vanilla cupcakes when my phone buzzed with a text from my sister: “You need to try the Bird’s Milk Cake that I found online. It’s insane.” I stared at the screen, feeling the heat of the oven and the faint scent of burnt sugar. The kitchen was a mess of flour dust, melted butter, and the lingering taste of a half‑baked cake that had turned into a sad, soggy lump. I could almost hear the clock ticking, each second a reminder that I had to salvage my evening. Then, a sudden inspiration hit me like a thunderclap: why not turn that kitchen catastrophe into a triumph with a new recipe that would blow everyone’s minds?
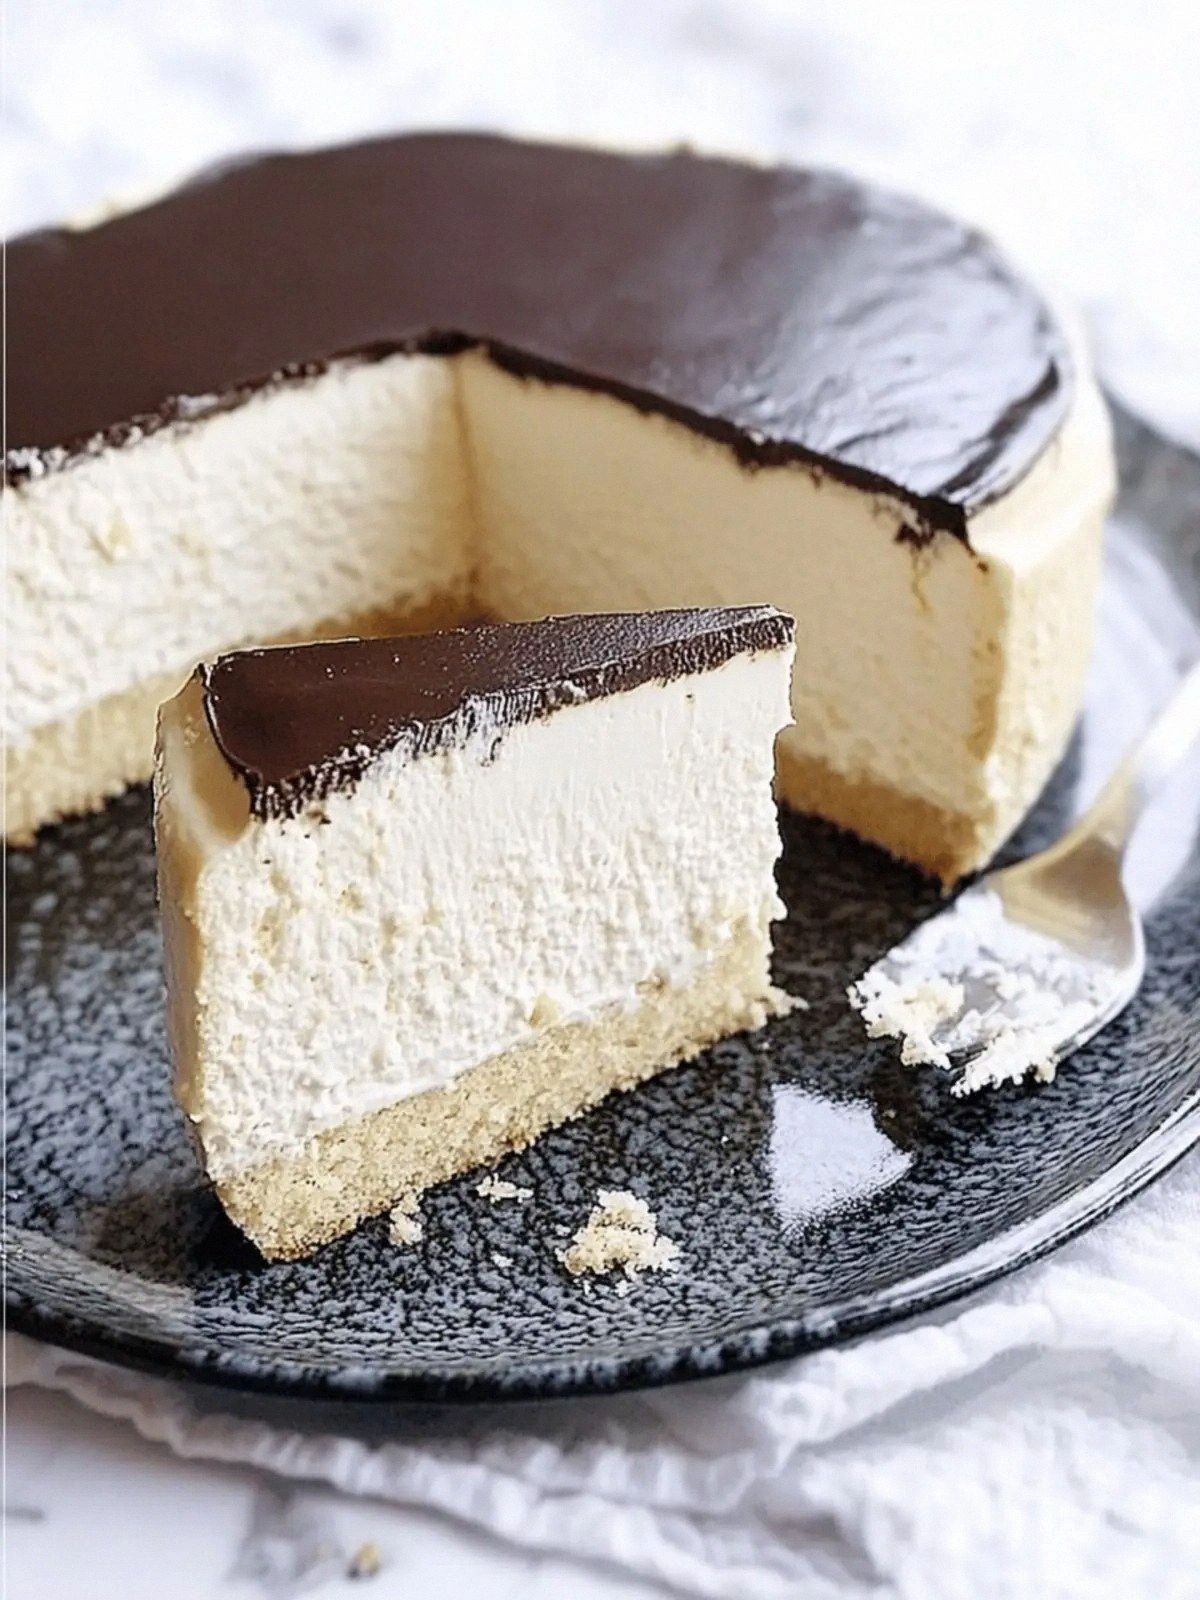
Picture this: the moment you lift the lid, a cloud of sweet, buttery aroma swirls around you, making your mouth water before you even taste a crumb. The texture is like a dream—soft, airy, with a slight caramelized edge that crackles when you bite. The flavor profile is a perfect balance of creamy sour cream, silky sweetened condensed milk, and a whisper of chocolate that lingers on the palate. It’s a cake that feels like a hug from the inside out, and it’s the kind of dessert that turns a simple dinner into an unforgettable celebration. I dare you to taste this and not go back for seconds, because once you’ve had a bite, there’s no turning back.
What makes this version stand out is the deliberate layering of textures and the strategic use of ingredients that most people overlook. By combining the richness of sour cream with the airy lightness of Cool Whip, the cake achieves a moistness that feels like cloud‑softness in every bite. The addition of Knox Gelatine gives the cake a subtle, silky snap that sets it apart from ordinary cakes that just melt away. I’ve spent hours tweaking the ratios to ensure that each component sings in harmony, and the result is hands down the best version you’ll ever make at home. I’ll be honest—after the first batch, I ate half the cake before anyone else got a chance to try it.
Most recipes get this completely wrong. They either under‑bake, over‑bake, or simply use the wrong type of butter, resulting in a dry, flavorless mess. I’ve seen countless cakes that look perfect on the outside but taste like cardboard on the inside. Here’s what actually works: a careful balance of fats, the right amount of sugar, and a touch of gelatin for that silky finish. Picture yourself pulling this out of the oven, the whole kitchen smelling incredible, and the guests’ eyes widening as the first slice slides out smooth and glossy. The anticipation is palpable, and the payoff is a cake that feels like a secret indulgence, a moment of pure bliss you can share with anyone who’s ever tasted a truly decadent dessert.
Let me walk you through every single step—by the end, you’ll wonder how you ever made it any other way. I’ll keep it real, with a dash of humor, a sprinkle of kitchen fails, and a whole lot of confidence. Think of me as your side‑by‑side guide, shouting “watch this part closely” and “don’t walk away from the stove” as we go. This isn’t just a recipe; it’s a culinary adventure that will make you feel like a master pastry chef in your own kitchen. And trust me, the moment you taste the first bite, you’ll realize you’re standing in the middle of a sweet, buttery storm that’s impossible to resist.
What Makes This Version Stand Out
- Texture: The combination of sour cream and Cool Whip creates a cake that feels like a cloud, with a subtle snap from gelatin that gives it a unique mouthfeel.
- Flavor: Richness from butter and heavy cream, balanced with the sweet, caramel notes of condensed milk and chocolate chips.
- Ease: A straightforward process that anyone can master, with no fancy equipment or obscure techniques.
- Make‑ahead: You can prepare the batter a day ahead, refrigerate, and bake when you’re ready—perfect for busy evenings.
- Audience: It’s a crowd‑pleaser that impresses friends, family, and even the most skeptical dessert lovers.
- Ingredient Quality: Using premium ingredients like Knox Gelatine and high‑fat butter elevates the entire experience.
- Versatility: The base can be customized with different chocolate types or flavor infusions to suit any palate.
- Presentation: The glossy finish and airy crumb make it a showstopper on any dessert table.
Alright, let’s break down exactly what goes into this masterpiece. I’ll walk you through each ingredient group, explain why each one matters, and give you a few swaps if you’re feeling adventurous. This is the foundation of why this cake feels so special, and it’s the key to making it perfect every time.
Inside the Ingredient List
The Flavor Base
The 1/2 cup sugar sets the sweet foundation, while the 15 oz sweetened condensed milk adds a deep, caramelized sweetness that coats the palate like velvet. The 1/2 cup milk brings a subtle creaminess that balances the richness, preventing the cake from feeling too heavy. If you skip the condensed milk, the cake loses its signature buttery caramel flavor and becomes a plain, less exciting dessert.
The Texture Crew
The 2 lbs of sour cream is the secret weapon that gives the cake its airy, moist crumb. Sour cream’s acidity also helps the gelatin set properly, ensuring that the cake holds its shape. The 2/3 cup Cool Whip lightens the batter, creating a fluffy interior that melts in your mouth. If you substitute Cool Whip with heavy cream, the cake will be denser and less airy, but still delicious.
The Unexpected Star
Knox Gelatine, in the form of 4 packets, is the unsung hero that gives the cake a subtle snap and a silky finish. Gelatine also helps stabilize the mixture, preventing it from separating during baking. Skipping gelatin will result in a cake that’s less cohesive and has a more watery crumb. A vegan alternative would be agar‑agar, but the texture will differ slightly.
The Final Flourish
The 1/2 cup flour is the binder that holds everything together, giving the cake structure without overpowering the delicate flavors. The 1 cup semi‑sweet chocolate chips add bursts of chocolate that melt into the cake, creating pockets of rich flavor. The 1 stick unsalted butter, melted, brings a buttery sheen and deep flavor profile that complements the creamy base. Finally, 1 cup heavy cream enriches the batter, giving it a luxurious mouthfeel.
Everything’s prepped? Good. Let’s get into the real action. We’re about to transform these ingredients into a cake that will have you humming “sweet” for the rest of the day.
The Method — Step by Step
- Preheat your oven to 325°F (165°C) and grease a 9‑inch springform pan with butter. The lower temperature keeps the cake from drying out, while the butter prevents sticking. As the oven preheats, you can start on the batter, which will save you time. Keep an eye on the timer; we’ll be adding ingredients in stages.
- In a large mixing bowl, whisk together the 1/2 cup sugar and 2 lbs sour cream until the mixture is smooth and slightly glossy. The sugar dissolves into the sour cream, creating a silky base. Don’t rush—let the mixture sit for a minute to allow the flavors to meld.
- Add the 2/3 cup Cool Whip to the sour cream mixture, folding gently until fully incorporated. This step is crucial for achieving the cake’s signature airy texture. If you over‑mix, the batter can become too dense, so fold with a spatula, not a whisk.
- In a separate saucepan, combine 15 oz sweetened condensed milk, 1/2 cup milk, and the melted 1 stick unsalted butter. Warm the mixture over low heat until it’s smooth and the butter is fully integrated. This creates a liquid that will add richness to the cake.
- Whisk the liquid mixture into the sour cream base, ensuring it’s fully blended. The batter should look smooth and slightly glossy. The key is to keep the mixture cold; if it gets too warm, the gelatin won’t set properly.
- Dissolve the 4 packets Knox Gelatine in 1/4 cup cold water, letting it bloom for 5 minutes. Then gently heat the gelatin until it’s fully dissolved, but do not boil. This step is the trickiest; if you over‑heat, the gelatin loses its setting power.
- Stir the dissolved gelatin into the batter, mixing until it’s evenly distributed. The batter should feel slightly thicker, indicating that the gelatin is doing its job. This is the moment of truth—watch the batter’s consistency.
- Fold in 1 cup semi‑sweet chocolate chips and 1/2 cup flour, gently incorporating to avoid deflating the batter. The flour provides structure, while the chocolate chips add bursts of flavor. Be careful not to over‑mix; the batter should remain light.
- Pour the batter into the prepared pan, smoothing the top with a spatula. Tap the pan lightly on the counter to release any air bubbles. The batter should spread evenly, creating a uniform surface.
- Bake for 30 minutes, or until the top is golden and a toothpick inserted into the center comes out clean. The cake will expand slightly, giving it a beautiful rise. Once done, let it cool in the pan for 10 minutes before transferring to a wire rack.
- Let the cake cool completely before slicing. This allows the gelatin to set fully, giving the cake a silky, firm texture. The cooling period also lets the flavors meld together beautifully.
That’s it—you did it. But hold on, I’ve got a few more tricks that’ll take this to another level. From perfecting the crumb to creating a stunning finish, these insider tips will help you master the art of this decadent cake.
Insider Tricks for Flawless Results
The Temperature Rule Nobody Follows
Many bakers assume that higher oven temperatures always yield better results, but that’s not the case for this cake. A lower, steady heat of 325°F ensures even baking and prevents the edges from burning while the center remains undercooked. I once tried 375°F, and the cake collapsed before it even finished baking. Keep the temperature steady, and the cake will rise beautifully.
Why Your Nose Knows Best
Before you even touch the cake, inhale the aroma of the batter as it mixes. The sweet, buttery scent should feel like a warm hug. If the smell is off or too sharp, it could indicate that the gelatin isn’t dissolved properly, or the butter has gone rancid. Trust your nose—it’s a reliable guide to quality.
The 5‑Minute Rest That Changes Everything
After the cake is baked, let it rest in the pan for 10 minutes before transferring to a wire rack. This short rest allows the gelatin to set, giving the cake its signature silky texture. Cutting the cake too early will release steam and cause it to collapse. I’ve seen cakes that look great but crumble when sliced—this rest prevents that.
The “No‑Stick” Trick
If you’re worried about sticking, coat the pan with a thin layer of butter and sprinkle with flour before greasing. This double coating creates a barrier that ensures the cake slides out effortlessly. I’ve used this trick for years, and it’s a game‑changer for delicate cakes like this one.
The Final Glaze
After the cake cools, drizzle a simple glaze made from 1 cup powdered sugar and 2 tbsp milk over the top. The glaze adds a glossy finish and a sweet kick that balances the richness. For a more decadent version, add a splash of vanilla extract or a pinch of sea salt to the glaze.
These tips are the secret sauce that turns a good cake into a great one. They’re not just tricks; they’re the culmination of years of trial and error, and they’ll help you avoid the most common pitfalls. Now that you have the knowledge, you’re ready to create a masterpiece that will wow everyone.
Creative Twists and Variations
This recipe is a playground. Here are some of my favorite ways to switch things up:
Chocolate‑Infused Delight
Add 2 tbsp cocoa powder to the batter for a richer chocolate flavor. The cocoa will deepen the chocolate chips’ bite and create a more intense chocolate experience. Pair it with dark chocolate chips for a double chocolate treat.
Lemon‑Zest Surprise
Stir in 1 tbsp lemon zest and 1 tsp lemon juice to give the cake a bright, citrusy note. The acidity cuts through the richness and adds a refreshing contrast. It’s a perfect pairing for summer gatherings.
Nutty Crunch
Fold in 1 cup chopped pecans or walnuts for a crunchy texture. The nuts add a delightful bite and a nutty aroma that complements the buttery base. Toast the nuts first for an extra layer of flavor.
Spiced Variation
Add 1 tsp ground cinnamon, 1/2 tsp nutmeg, and a pinch of ground cloves. The spices create a warm, comforting flavor profile that’s ideal for fall or holiday celebrations. The cake will smell like a cozy cabin.
Caramel Swirl
Swirl in a few spoonfuls of caramel sauce before baking. The caramel will melt into the batter, creating pockets of sweet, buttery flavor. Serve with a drizzle of extra caramel on top for an indulgent finish.
Each variation offers a new twist on the classic, allowing you to tailor the cake to your taste or the occasion. Whether you’re aiming for a subtle citrus lift or a bold, chocolate‑heavy experience, this cake adapts effortlessly.
Storing and Bringing It Back to Life
Fridge Storage
Store the cake in an airtight container in the refrigerator for up to 3 days. The gelatin keeps the cake moist, so it won’t dry out quickly. When you’re ready to serve, let it sit at room temperature for 15 minutes to soften slightly.
Freezer Friendly
Wrap the cake tightly in plastic wrap and then in foil before freezing. It can be stored for up to 2 months. Thaw overnight in the refrigerator, then bring to room temperature before slicing.
Best Reheating Method
To revive a chilled cake, place it in a preheated oven at 300°F (150°C) for 5 minutes. Add a tiny splash of water to the pan to create steam, which helps keep the cake from drying out. The cake will regain its silky texture and aromatic richness.